The Ultimate Guide to Photoshop Brush Settings: Shape Dynamics, Dual Brush, and More
If you’ve ever tried digital painting in Photoshop and felt your strokes looked too mechanical or flat, you’re not alone. The secret sauce to more natural, textured, expressive brushes lies in the brush settings themselves. With the right tweaks—Shape Dynamics, Dual Brush, Scatter, Texture, and more—you can turn an ordinary brush into something that feels alive.
In this guide (current as of October 2025), I’ll walk you through the key brush settings, show how they interact, and give you tips and mini-recipes for smoother strokes, texture brushes, and realistic effects. Let’s dig in.
Getting Started: The Brush Settings Panel
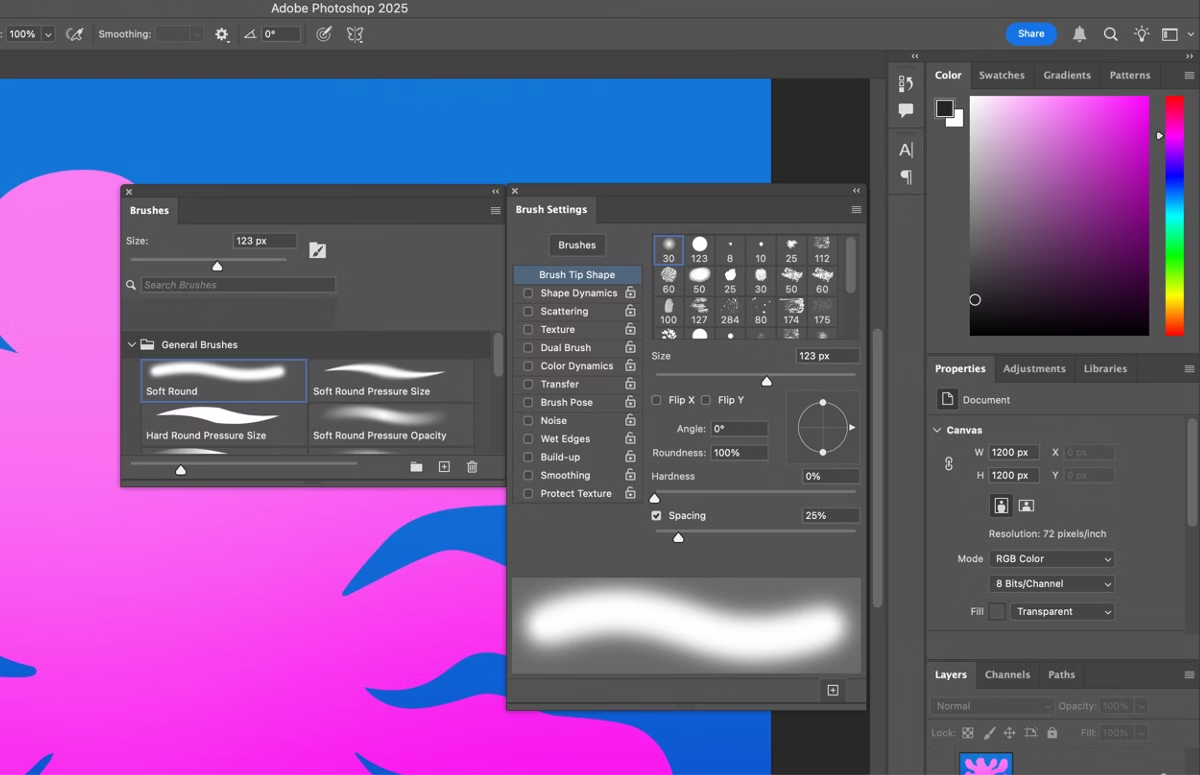
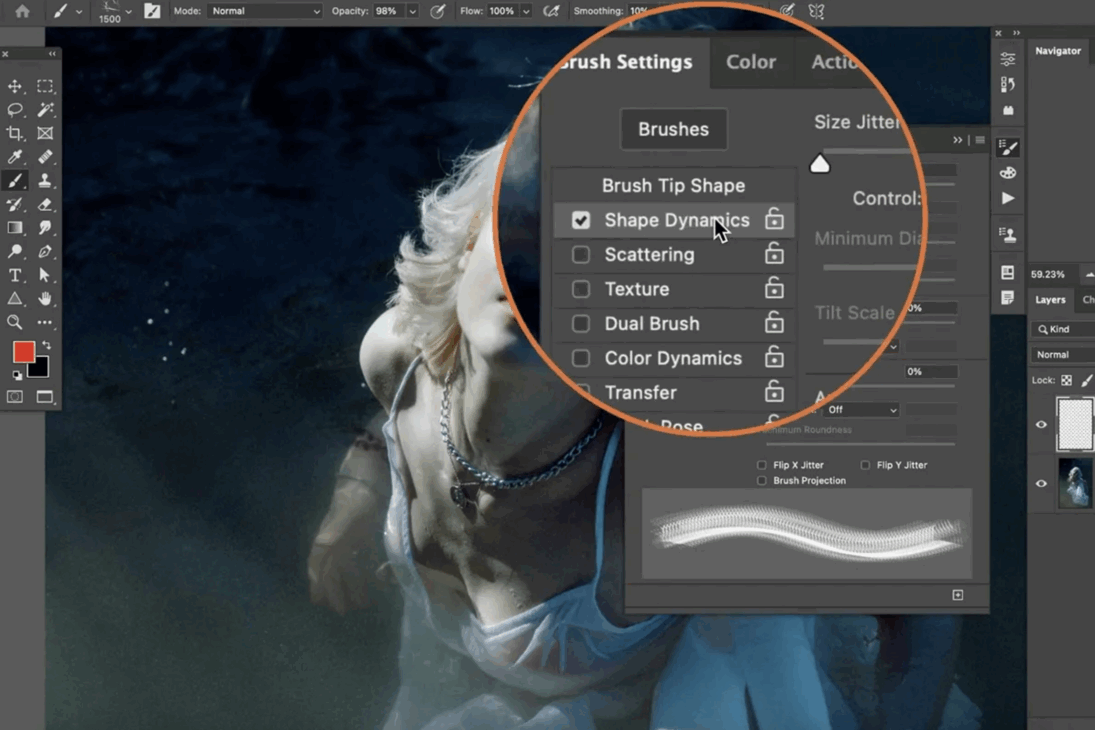
First, open Window → Brush Settings (or press F5) to get the full panel. This is where all the dynamic magic lives. The left sidebar lists categories like “Brush Tip Shape,” “Shape Dynamics,” “Dual Brush,” “Texture,” “Scattering,” “Transfer” (opacity/flow), and more. Whenever you click the words (not just the checkbox), the detailed controls appear on the right.
As you adjust settings, keep a document open so you can test strokes in real time. The preview at the bottom of the panel helps, but seeing it live is better.
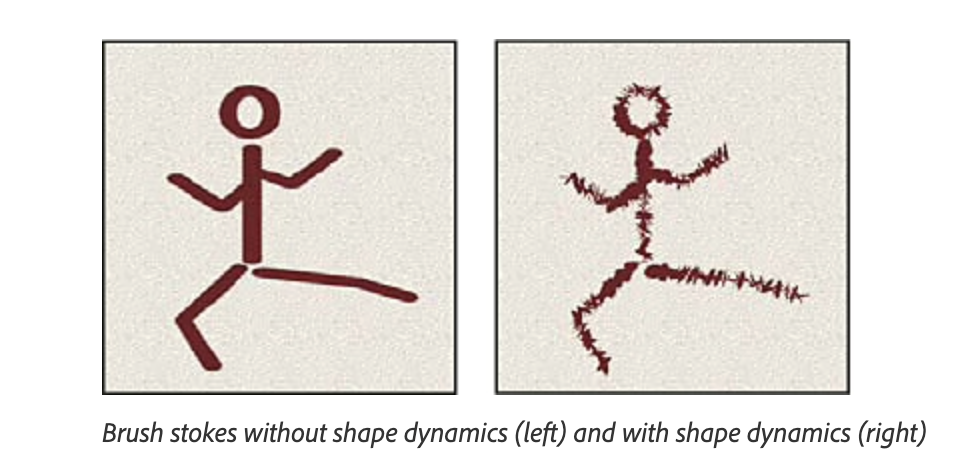
Shape Dynamics: The Core Motion Engine
Shape Dynamics is where you control how your brush changes shape mid-stroke—size, angle, roundness, etc. Turning this on helps you avoid the “uniform stamp” look.
Key controls in Shape Dynamics
- Size Jitter with Control: Adds randomness to the brush size as you paint. If you have a tablet, set Control to Pen Pressure so pressing harder makes a thicker stroke.
- Minimum Diameter: Ensures your brush never shrinks below a certain fraction of its full size.
- Angle Jitter / Control: Let your brush rotate randomly or respond to direction of stroke.
- Roundness Jitter: Squash/stretch the brush randomly to add variety.
- Flip X / Flip Y Jitter: Randomly flips the brush along axes.
- Brush Projection: On tablets, the tilt or rotation of your pen can warp brush projection.
One caveat: some users note that certain settings like Initial Direction under Shape Dynamics may behave inconsistently (especially after updates) in Photoshop versions 24-25.
Tip for smoothness: Use Size Jitter with Pen Pressure, and keep minimum diameter around 20–40% to avoid tiny dots.
Dual Brush: Mixing Two Brush Shapes
Dual Brush lets you combine a second brush shape into your main brush—mixing textures, adding complexity. Think of it as layering a pattern or shape inside your brush tip.
How it works:
- Choose the secondary brush tip.
- Adjust its Diameter, Spacing, Scatter, and Count settings (these control how many instances of that brush appear, how spread out, etc.)
- Use Mode (Blend modes like Overlay, Hard Light) to change how the two tips mix.
- You can Flip, Scatter, or limit the second brush inside the shape of the first one.
- The secondary brush is always “clipped” by the shape of the main one—it won’t exceed its boundaries.
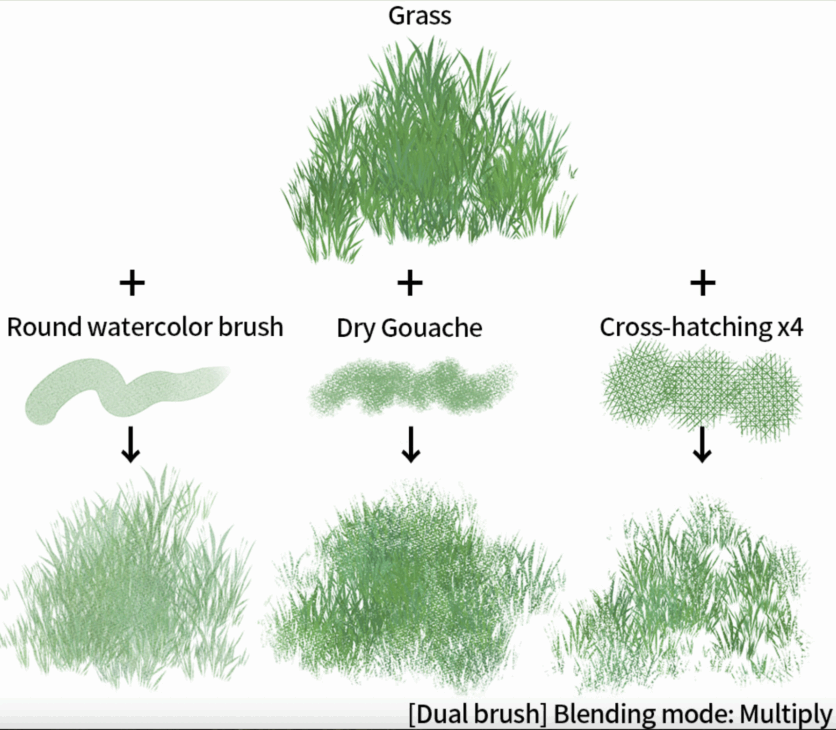
In practice, Dual Brush is great for making texture brushes: e.g. combining a soft round brush with a grainy tip to get painterly grit without harsh edges.
Texture, Scattering & Transfer: Layering Realism
Beyond dynamics and dual brushes, these other panels let you add natural variation, softness, and randomness.
- Texture: Apply a pattern or noise map to your brush so the stroke carries subtle texture variation. Useful for cloth, skin, rock, etc.
- Scattering: Spread the brush stamps out from the path—you can scatter in one axis or both axes. Combine with Count to multiply the effect.
- Transfer (Opacity / Flow Jitter): Vary how opaque or how “strong” each brush stamp is. With Control set to Pen Pressure, you can fade or layer more softly.
Together, these panels let you push realism: a textured brush with slight scatter and opacity variance feels less digital and more organic.
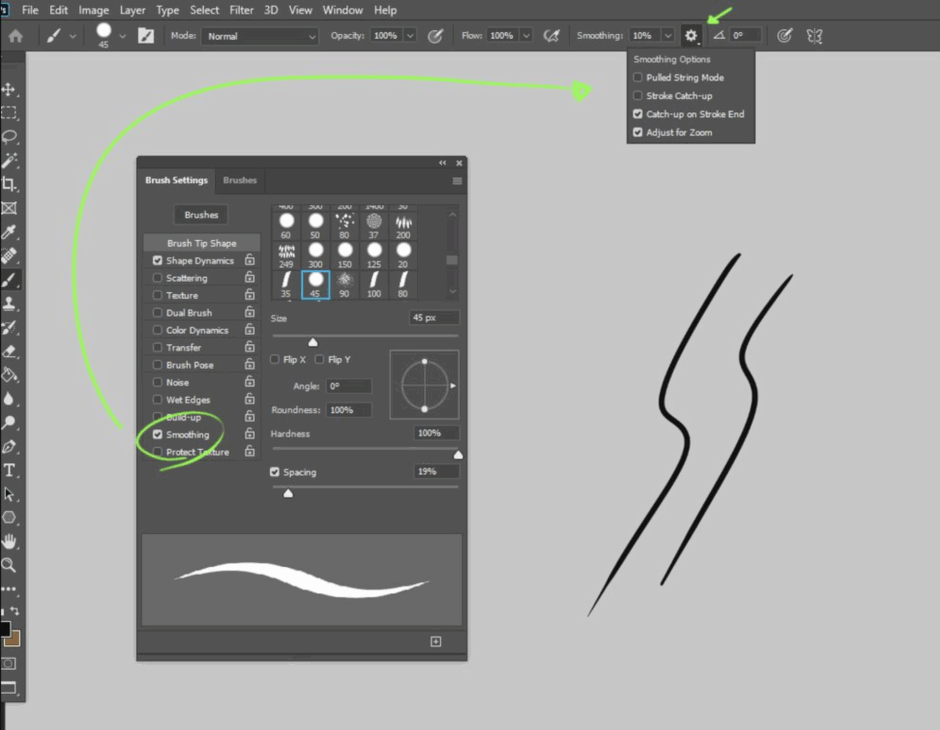
Smoothing, Spacing & Stroke Logic
Even before dynamics, Photoshop has a Smoothing control (in the top options bar when brush is active). It smooths your cursor movements, helping eliminate jitter or wobble.
Also, the Spacing in the Brush Tip Shape (how far apart stamps are) interacts deeply with dynamics. If spacing is too high, jitter or scatter become obvious dots rather than fluid strokes. If too low, textures may blur. Best practice: lower spacing when doing fine lines; increase when building texture.
Sample Brush Recipes & Use Cases
Here are a few mini-recipes you can try immediately:
| Purpose | Start Base | Key Settings to Enable | Notes |
| Soft foliage / grass texture | Round brush | Scatter (both axes), Dual Brush (grain tip), Shape Dynamics size jitter | Combine with green hues and layer blending |
| Painterly skin / portraits | Soft round with slight texture | Texture panel, Transfer opacity jitter, slight scattering | Keep dynamics subtle to avoid blotchy effect |
| Chalk / pastel effect | Chalky brush tip as main | Dual Brush with speckle tip, scatter, opacity jitter | Use Blend Mode (e.g. Multiply) to blend layers nicely |
| Rock / grit texture | Hard tip brush | Texture + dual brush grit, scattering | Use pressure to control density |
Try adjusting one setting at a time to see its effect.
Common Issues & Troubleshooting
Some settings might not behave as expected depending on your hardware or Photoshop version. Here are a few spots to watch out for:
- Shape Dynamics not working: This often happens when using a mouse instead of a tablet. Photoshop may show a warning icon next to controls if no pen is detected.
- Fade control not appearing/working: Some users find that Fade (a size variation method) stops working after updates. Deleting preferences or resetting your brush settings sometimes fixes it.
- Dual Brush preview small/confusing: The preview is limited; test directly on canvas to get a true feel.
- Initial Direction bug: Some users report that the Initial Direction control in Shape Dynamics is inconsistent or buggy in recent versions.
If a brush setting seems “dead,” check whether you have a tablet connected, driver issues, or whether your brush preset is locked/overridden.
Workflow Tips for Smooth Creation
- Start minimal: first enable Shape Dynamics (size jitter + pen pressure) and smoothing.
- Add texture or scatter only after your stroke basics feel good.
- Use Dual Brush sparingly: it’s powerful, but easy to overdo.
- Save incremental brush presets (duplicate before big changes).
- Test at full size (zoomed out) — what looks subtle close up often reads into texture at viewing scale.
Final Thoughts
Getting the most out of Photoshop’s brush settings is like tuning a musical instrument. Shape Dynamics gives you movement, Dual Brush adds secondary texture, scattering and transfer add variability, and smoothing ties it all together. Master those, and your digital paintings will feel less machine-made and more alive.