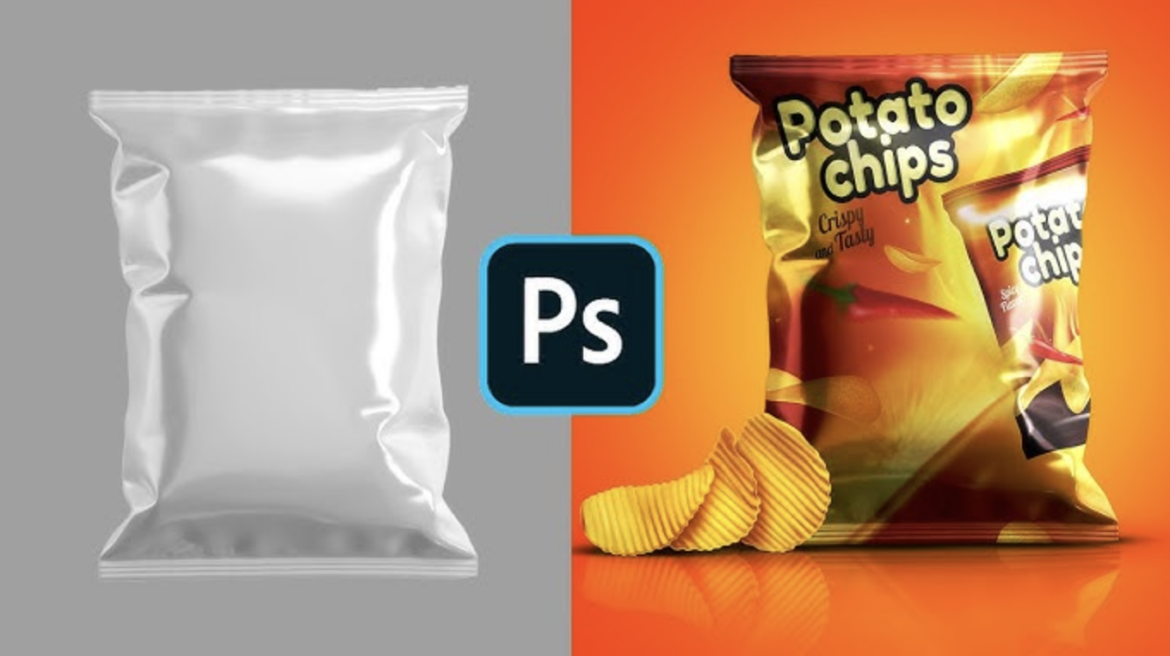
Zero 3D Skills Needed: Creating Packaging Mockups in 2026
Let’s be honest: unless you are a secret genius at Blender or Cinema 4D, making realistic product mockups used to be a nightmare.
You know the drill. You spend three hours fighting with the “Vanishing Point” filter, trying to force a flat logo onto a round coffee mug, only to end up with something that looks like a sticker floating in zero gravity.
In 2026, those days are officially over. With the maturity of the Mockup Panel and the new Firefly Image 4 integration, you can now create studio-quality packaging renders without knowing a single polygon from a pixel.
Here is how to fake 3D mastery in Photoshop 2026.
The Tool You Missed: The “Mockup” Panel
If you are still manually warping layers with Ctrl+T, stop.
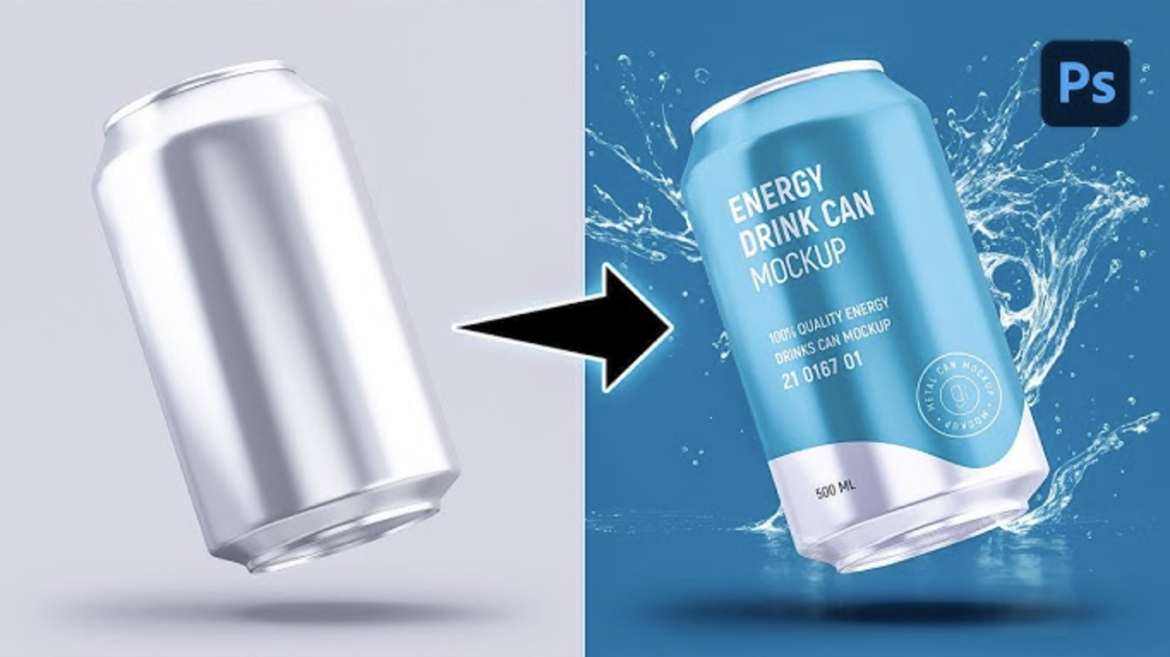
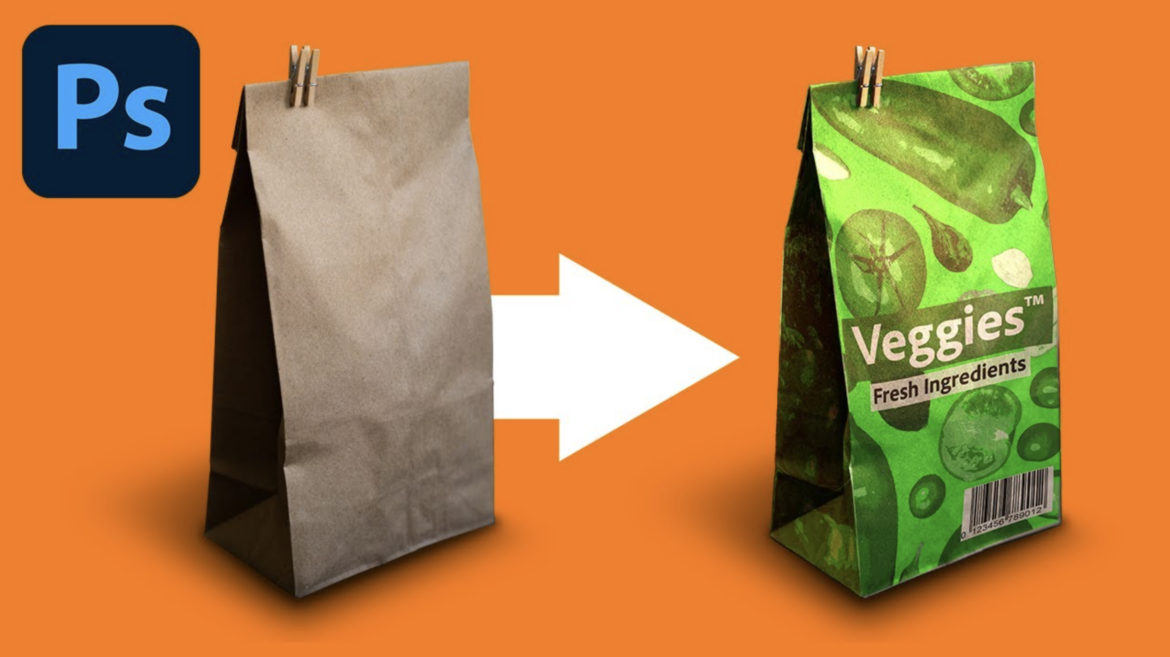
Adobe quietly moved the Mockup feature out of beta late last year, and it is now the default way to handle packaging. It doesn’t just “paste” your image; it uses a local AI model to scan the photo, understand the geometry (is it a cylinder? a crumpled bag?), and wrap your art accordingly.
How to use it:
- Open your base image (e.g., a photo of a blank hoodie or a box).
- Select your design layer (your logo or label).
- Go to Window > Mockup.
- Click the specific object in the image you want to brand.
Boom. Photoshop automatically converts your layer into a Neural Smart Object, wrapping it around the curves and folds instantly.
Step 1: Generate Your “Studio” (No Camera Required)
Don’t have a photo of a blank cosmetic bottle sitting on a mossy rock at sunset? Just dream it up.
The Generative Fill workspace has evolved. In 2026, you don’t need to hunt for stock photos.
- The Prompt: Use the Contextual Task Bar to type: “Blank amber glass dropper bottle on a marble table, soft studio lighting, high resolution.”
- The Trick: Use the new “Reference Image” toggle. Upload a crude sketch of the bottle shape you want, so the AI doesn’t give you a weird alien perfume bottle.
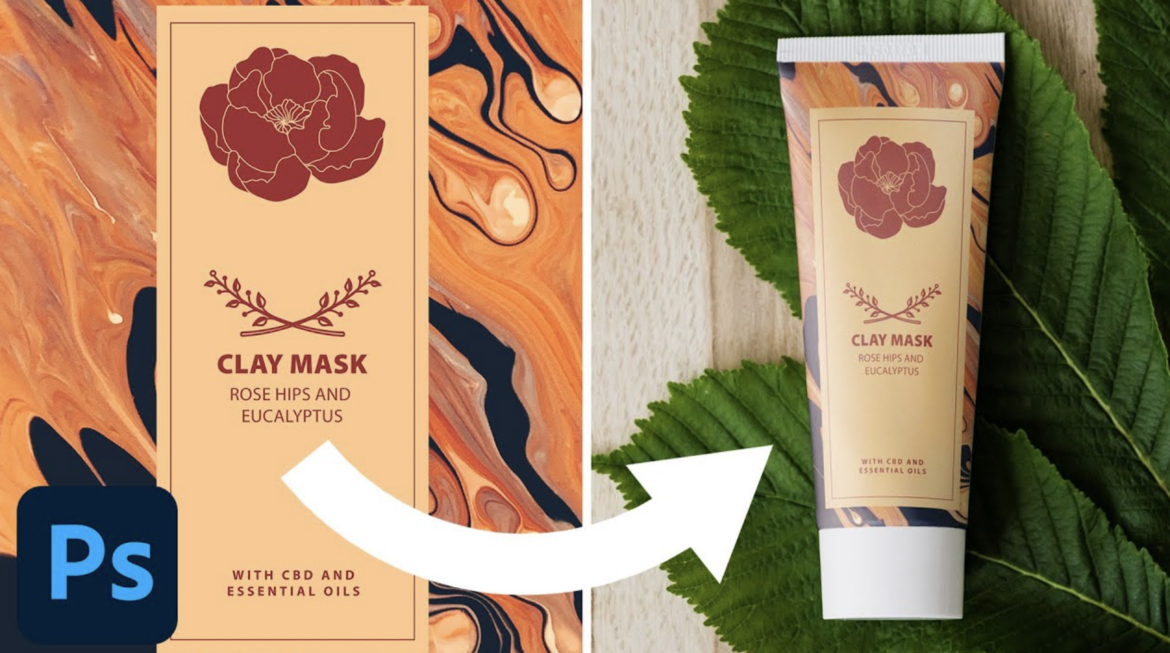
Step 2: The “Texture Injection” Technique
This is the pro tip that separates the amateurs from the experts in 2026.
When you place a clean vector logo onto a photo of a canvas tote bag, the logo usually looks too perfect. It floats above the fabric. To fix this, we use a workflow now called “Texture Injection”.
- Wrap it: Apply your logo using the Mockup Panel as described above.
- Blend it: Double-click the layer to open Blending Options.
- The “Underlying Layer” Slider: Hold Alt (or Option) and split the “Underlying Layer” slider. Drag it until the texture of the canvas bag starts to poke through your ink.
Why this works: The new Mockup engine is smart enough to respect these blending ranges better than the old “Displace” filter ever did. It makes the ink look absorbed, not just floating.
Step 3: Fix the Lighting with “Harmonize”
The biggest giveaway of a fake mockup is lighting. Your bottle is lit from the left, but your logo looks flat.
In 2026, we don’t paint shadows manually. We use the Harmonize neural filter.
- Select your Smart Object layer.
- Go to Filter > Neural Filters > Harmonize.
- Select your background image as the “Source.”
The AI analyzes the light direction and color temperature of the scene and re-shades your logo to match. It adds subtle gradients and casts shadows exactly where they should be.
The “Hybrid Reality” Workflow
The industry has a name for this now: “Hybrid Reality” assets. It’s the sweet spot where AI generates the scene, but you control the branding via traditional layers.
Why it wins:
- Speed: A 3-hour 3D render job is now a 5-minute Photoshop task.
- Editability: Because the Mockup Panel uses Smart Objects, if the client says “make the logo bigger,” you just double-click and resize. No re-rendering required.
So go ahead. Tell your client you spent all weekend setting up studio lights. Your secret is safe with the NPU.