How to Create Stunning Instagram Graphics with Photoshop

Instagram is all about visual storytelling, and creating eye-catching graphics is essential to stand out in a crowded feed. Whether you’re posting for your personal brand, business, or just for fun, Photoshop offers powerful tools to help you create stunning Instagram graphics that grab attention. In this step-by-step guide, we’ll show you how to use Photoshop to create beautiful, share-worthy Instagram posts.
Step 1: Set Up Your Document
Before you start designing, you’ll need to set up your Photoshop document to the right dimensions for Instagram posts. Instagram posts are typically square, but you can also create vertical or horizontal posts depending on the format you want.
- Open Photoshop and go to File > New.
- For a standard Instagram post, set the document size to 1080px by 1080px (this is the ideal resolution for Instagram).
- Set the Resolution to 300 pixels/inch for high-quality output, especially if you plan to use the graphic in print as well.
- Set the Color Mode to RGB because Instagram uses this color space for digital displays.
Step 2: Choose a Background
The background of your Instagram graphic is crucial because it sets the tone for the entire design. You can use solid colors, gradients, or even an image as your background.
- Solid Color Background:
- Select the Paint Bucket Tool (G) from the toolbar.
- Choose a color from the color picker at the bottom of the toolbar.
- Click anywhere on the canvas to fill it with your selected color.
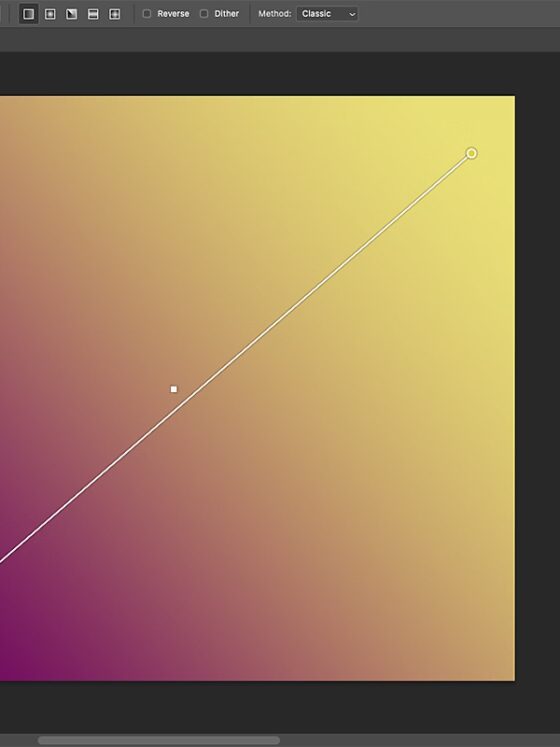
- Gradient Background:
- Select the Gradient Tool (G) from the toolbar.
- In the top options bar, click the gradient preview to open the Gradient Editor and select a gradient, or create your own.
- Click and drag on the canvas to apply the gradient.
- Image Background:
- If you prefer to use an image as a background, go to File > Place Embedded, choose your image, and resize it to fit the canvas. You can use Ctrl + T (Cmd + T on Mac) to adjust the size and position.
- Once the image is placed, you can apply a Gaussian Blur (Filter > Blur > Gaussian Blur) to soften the background if you want your text or elements to stand out more clearly.
Step 3: Add Text to Your Graphic
Text is the focal point of many Instagram graphics. Whether you’re adding a catchy quote, promotion, or your brand name, make sure your text is clear and easy to read.
- Select the Text Tool (T) from the toolbar.
- Click anywhere on the canvas and type your text.
- Highlight the text and adjust the font, size, and color from the options at the top of the screen.
- You can also adjust the line spacing and letter spacing to make your text look more balanced.
- To change the font, click on the font name in the options bar, and choose one that fits the style of your post.
Tip: For a professional look, try using bold or sans-serif fonts for modern designs, and script fonts for elegant and creative styles.
Step 4: Enhance Your Text with Layer Styles
Adding layer styles to your text will give it more depth and make it stand out from the background.
- Right-click on your text layer in the Layers Panel and select Blending Options.
- Apply different styles, such as:
- Drop Shadow: Adds depth and makes the text pop.
- Outer Glow: Creates a glowing effect around the text.
- Bevel and Emboss: Gives the text a 3D effect.
- Stroke: Adds a border around the text.
Tip: Play with the settings for each layer style to achieve the desired effect. For example, adjust the opacity of the Drop Shadow or change the color of the Outer Glow to match your brand’s palette.
Step 5: Add Graphics or Icons
To make your design more engaging, consider adding graphics or icons to complement your message. You can use shapes, illustrations, or logos that reflect your theme or branding.
- To add an icon or graphic, go to File > Place Embedded and select your graphic file.
- Resize and position the graphic using Ctrl + T (Cmd + T on Mac) to adjust it on the canvas.
- You can also use Shapes (such as rectangles, circles, or lines) by selecting the Shape Tool from the toolbar. Draw your desired shape and adjust the fill color and stroke width in the top options bar.
Tip: Use vector-based icons (like those from free icon websites) to ensure your graphics are sharp and scalable without losing quality.
Step 6: Apply Filters for Visual Appeal
If you want to give your graphic a unique, stylized look, filters can add that extra flair. For Instagram posts, filters can help set the mood and give your design a consistent vibe.
- Once your design is complete, you can apply filters to the entire image.
- Go to Filter > Filter Gallery to explore various filter options.
- You can choose from Artistic, Sketch, or Texture filters, among others, to achieve your desired effect.
Tip: Keep filters subtle and don’t overdo it. A slight Gaussian Blur or soft Glowing Edge can give your design a creative touch without overwhelming the text or visuals.
Step 7: Add a Call-to-Action (CTA)
If your Instagram graphic is promotional or meant to engage your audience, including a call-to-action (CTA) is important. A CTA encourages viewers to take action, such as visiting your website, signing up for a newsletter, or shopping your products.
- Add a new text layer with your CTA (e.g., “Shop Now”, “Learn More”, “Follow Us”).
- Use a different font style, size, or color to make your CTA stand out from the rest of the text.
- Position the CTA in a prominent place, such as at the bottom or center of the design.
Tip: Keep your CTA short, clear, and action-oriented. Use an active verb and create urgency to encourage followers to take action.
Step 8: Export Your Instagram Graphic
Once you’re happy with your design, it’s time to save and export your graphic for Instagram.
- Go to File > Export > Export As.
- Choose the JPEG or PNG format (PNG is ideal for images with transparency).
- Ensure the Resolution is set to 72 pixels/inch (standard for web and social media use).
- Check that the Dimensions are 1080px by 1080px (or other dimensions for vertical/horizontal posts).
- Click Export to save the file to your computer.
Step 9: Post on Instagram
Now that you’ve created a stunning graphic, it’s time to share it with your followers! Open the Instagram app, upload your image, and write an engaging caption. Don’t forget to add relevant hashtags and geotags to increase the reach of your post.
Conclusion
Creating stunning Instagram graphics with Photoshop is all about creativity, consistency, and using the right tools. By following this step-by-step guide, you can design beautiful, professional-looking posts that resonate with your audience. Experiment with different fonts, colors, and effects to develop your own unique style. With Photoshop’s extensive features, you have the power to bring your Instagram content to life and engage your followers in a visually captivating way. Happy designing!