How to Use Photoshop’s AI-powered Image Tools
Adobe, the creator of Photoshop, is no stranger to AI-generated images, but today marks a significant advancement in their push for accessible and ethical generative AI. For the first time, users can now create entire images from scratch directly within the Photoshop app without needing to leave the platform. This feature is powered by Adobe’s new Firefly Image 3 model and includes tools to generate backgrounds, upload reference images, and refine existing AI art.
What is Adobe Firefly?
Firefly is Adobe’s proprietary AI art generator. While it has been partially integrated into Photoshop since last year, offering features like generative expand for aspect ratio adjustments, the ability to create images from scratch has previously been exclusive to the Firefly web app (with some workarounds involving generative fill on a blank canvas).
What sets Firefly apart from other AI art models is its use of training data sourced only from Adobe’s own stock photography and artwork, ensuring a safer option for commercial use. The latest update, Firefly Image 3, promises to deliver “higher-quality images” with improved composition, lighting, and a better understanding of user prompts.
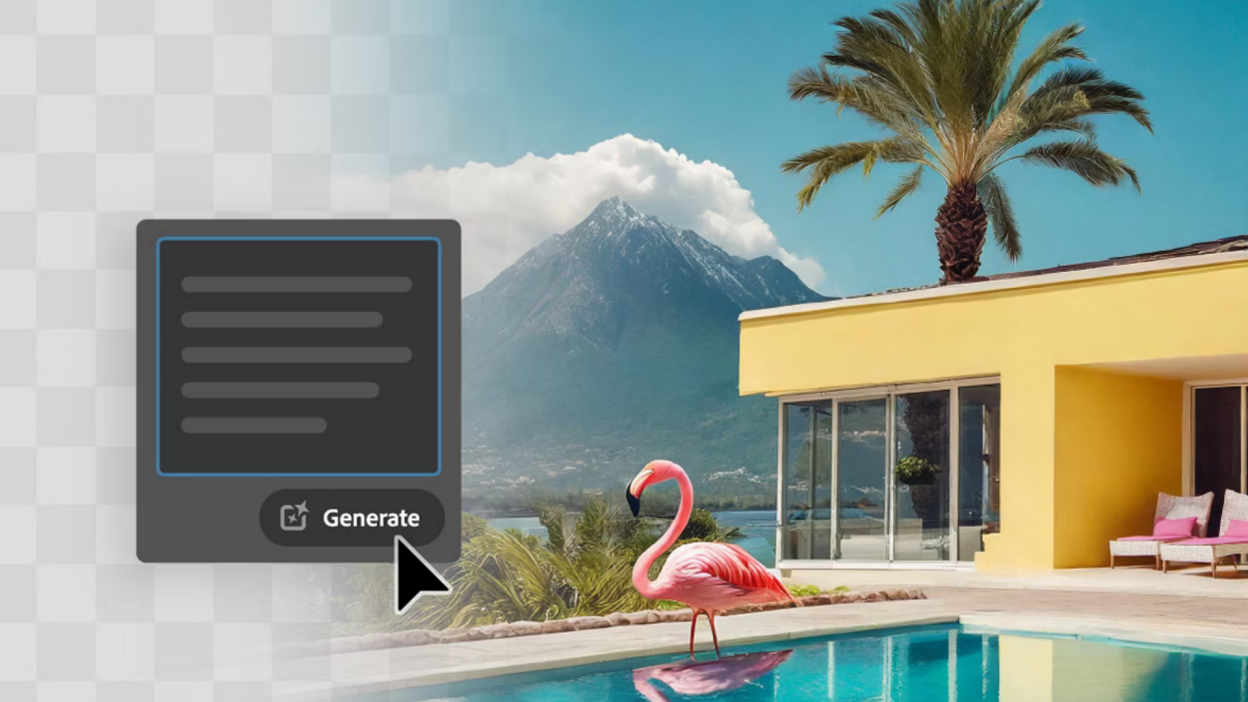
How to start generating AI images in Photoshop
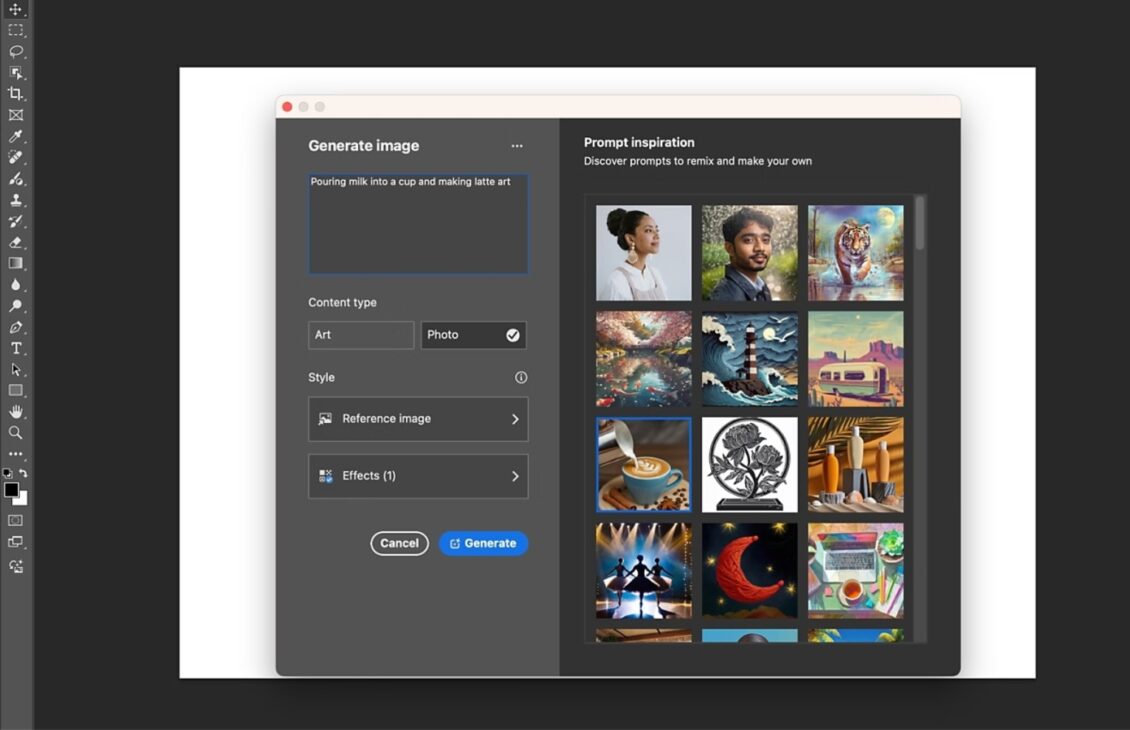
First, download the Photoshop beta desktop app, as these features are still in testing. After that, open a new project, go to the Contextual Task Bar, and click on “Generate Image.” If it’s not immediately visible, you can also find it by navigating to Edit > Generate Image or checking your Tools panel.
Next, enter your prompt. In the Contextual Task Bar, you’ll also find buttons for switching the Content Type between Photo and Art, as well as applying Style Effects to your image. These options can be used both before and after generating the image, and they will also appear in the Properties Panel.
How to use Photoshop to generate an AI image with a reference
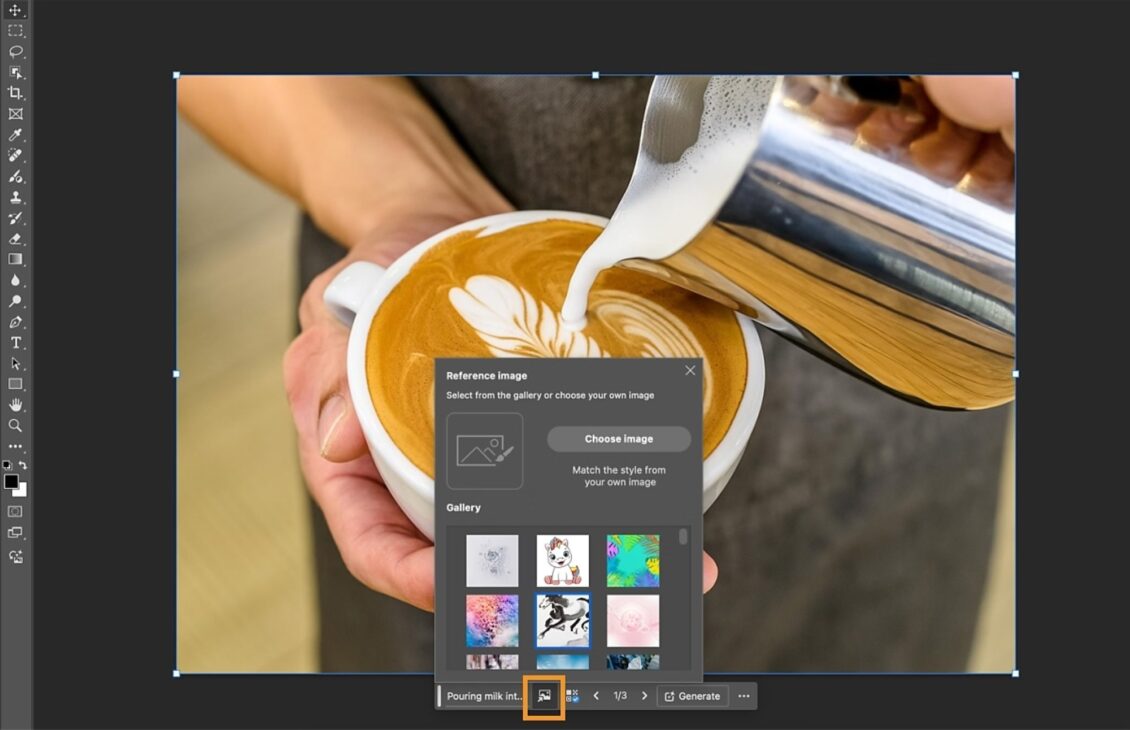
Photoshop doesn’t limit you to creating images from scratch; you can also use an existing image to guide the AI in its creation.
To use a reference image when generating AI art in Photoshop, start by generating a base image using the steps mentioned earlier. Next, go to the Contextual Task Bar or Properties Panel and select Reference Image. Upload your reference image and run your prompt again to adjust the output to better align with your reference. Photoshop also provides a selection of its own reference images that you can use if you prefer not to upload your own.
How to tweak AI art generated in Photoshop
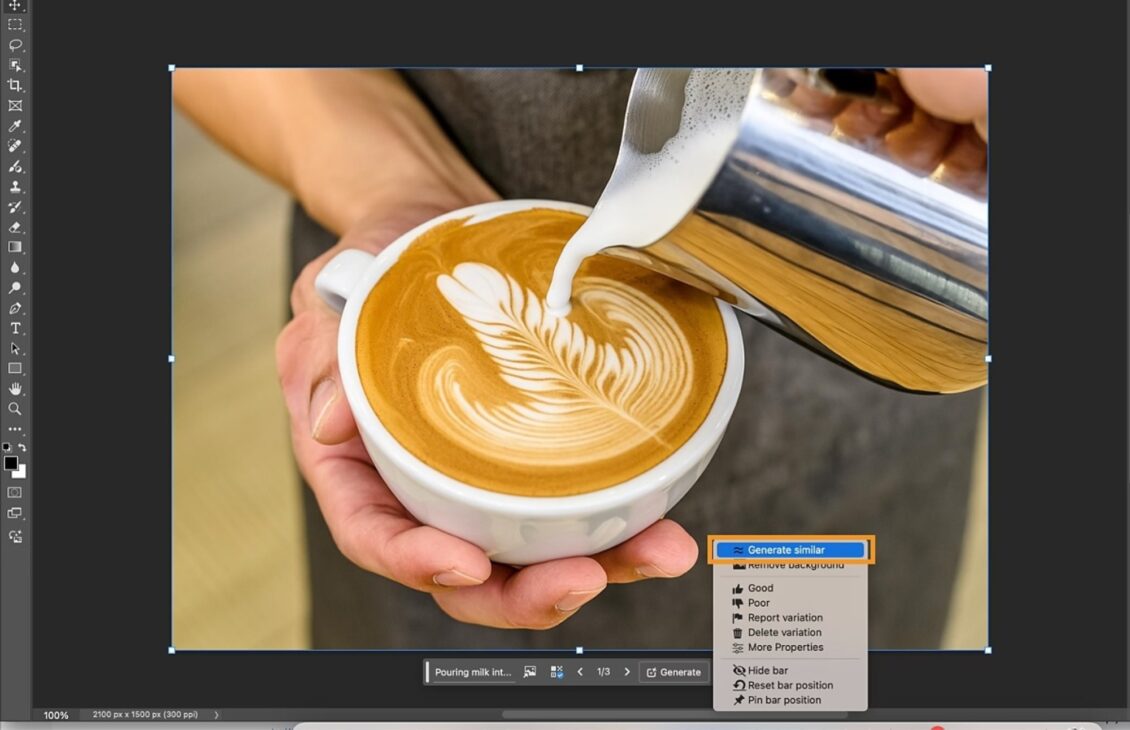
The latest Photoshop beta includes a “Generate Similar” feature, which lets you make slight adjustments to already generated AI images. It functions similarly to the “Reference Image” feature but allows you to use images you’ve just created, eliminating the need to download and re-upload them.
To generate similar AI art, first follow the steps mentioned earlier to create an image from scratch. Then, select your image and click on Generate Similar either from the Contextual Task Bar or under the three dots icon in the Variations Panel. You can view your generated variations in the Properties Panel.
How to generate an AI background in Photoshop
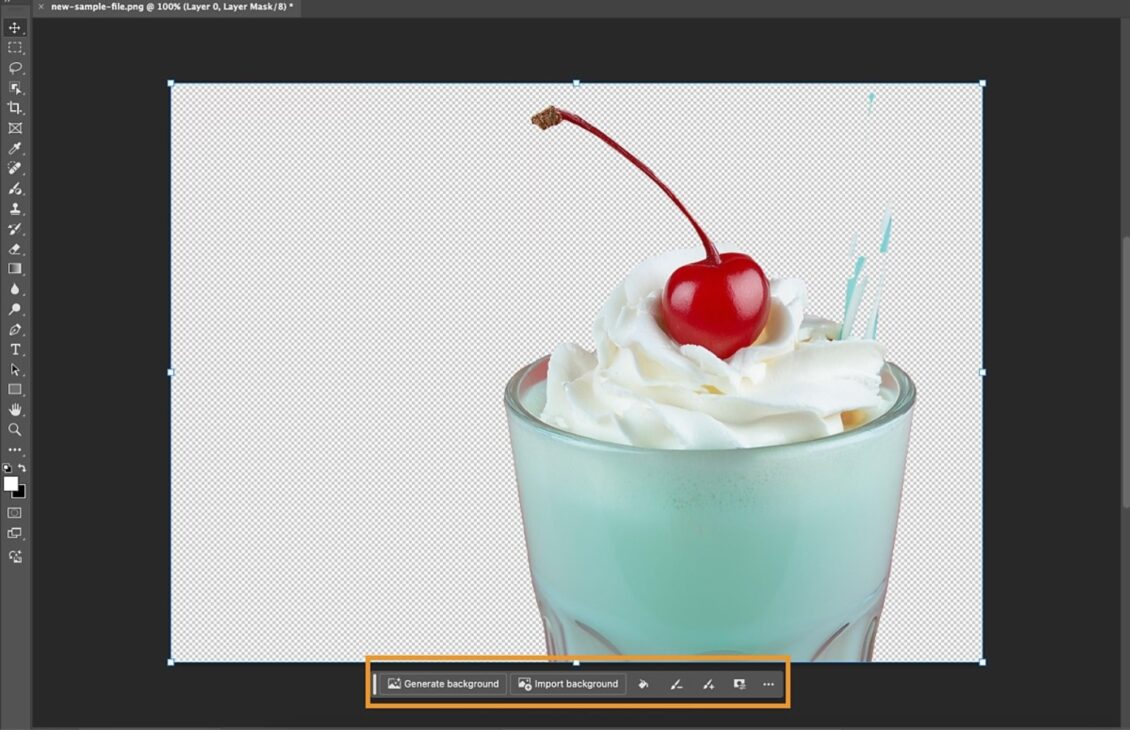
You can also remove backgrounds from existing images and replace them with AI-generated ones. To do this, first select Import Image on a blank canvas, then click Remove background in either the Contextual Task Bar or the Discover Panel.
Next, go to the Contextual Task Bar or Edit Menu and choose Generate Background. This will allow you to follow a similar process to generating an image from scratch.
How to enhance detail in Photoshop
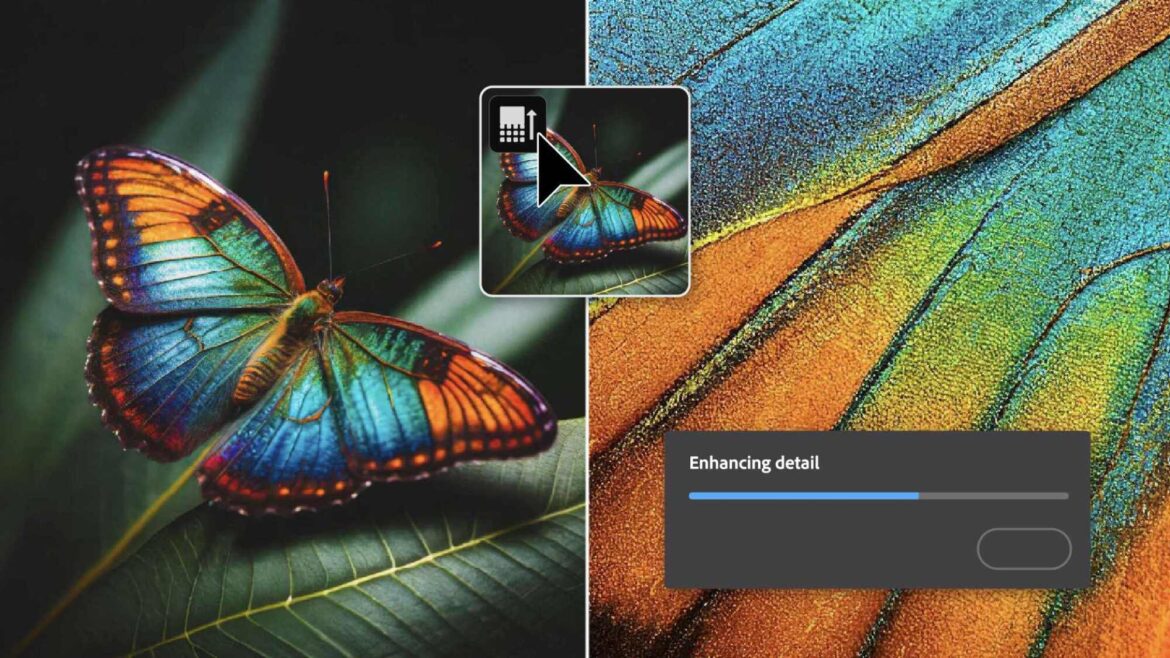
The final AI feature in the new Photoshop beta is Enhance Detail. This is an enhancement to the Generative Fill tool, which can be accessed from the Contextual Task Bar or the Edit Menu. Unlike Generate Image, Generative Fill generates objects in specific areas of your canvas.
After generating an object with Generative Fill, go to the Properties Panel and select Variations. From there, you can choose a specific version of the object and click the Enhance Detail icon to increase its sharpness and overall detail.
New non-AI features in Photoshop
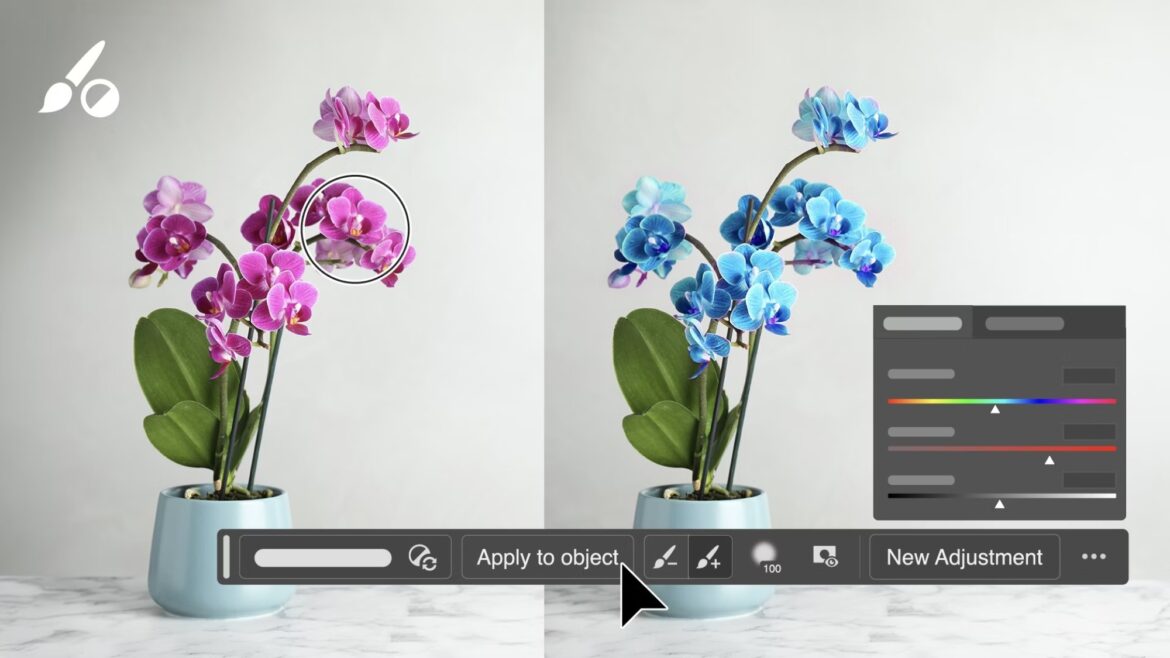
Along with the new suite of AI features, Photoshop introduces the Adjustment Brush, which allows you to make non-destructive, non-AI-based color and lighting adjustments to specific parts of an image. For example, you could change a section of blue hair to green.
To use the Adjustment Brush, select it from the Brush Tool in the Tools Panel. Then, choose your desired adjustments and paint over the areas you want to modify. These changes will be applied on a new layer, preserving the original image file.
In addition to the Adjustment Brush, the new Photoshop beta also includes an improved font browser, enabling direct access to cloud-stored fonts without needing to leave the program.