Photoshop Guide: Key Tips and Techniques You Should Know
When it comes to mastering photo editing, learning the “Photoshop how-to” techniques can truly make a difference.
Picture transforming your photos from simple to stunning with just a few clicks. This guide is crafted to capture your attention, ignite your curiosity, and reveal the amazing possibilities Photoshop has in store.
By the end of this article, you’ll be motivated and ready to take your editing skills up a notch.
Let’s embark on this exciting journey and discover the hidden secrets of Photoshop together.
Step-by-Step Photoshop Guide
Dive into essential Photoshop tutorials with straightforward, step-by-step instructions.
Whether you’re a beginner or an experienced user, these guides will help you master the tools and techniques that will elevate your editing game.
Getting Started with Photoshop Tutorial
Start by launching Adobe Photoshop from your applications. Upon opening the program, you’ll see the home screen where you can:
- Create a new project
- Open an existing image via the file menu
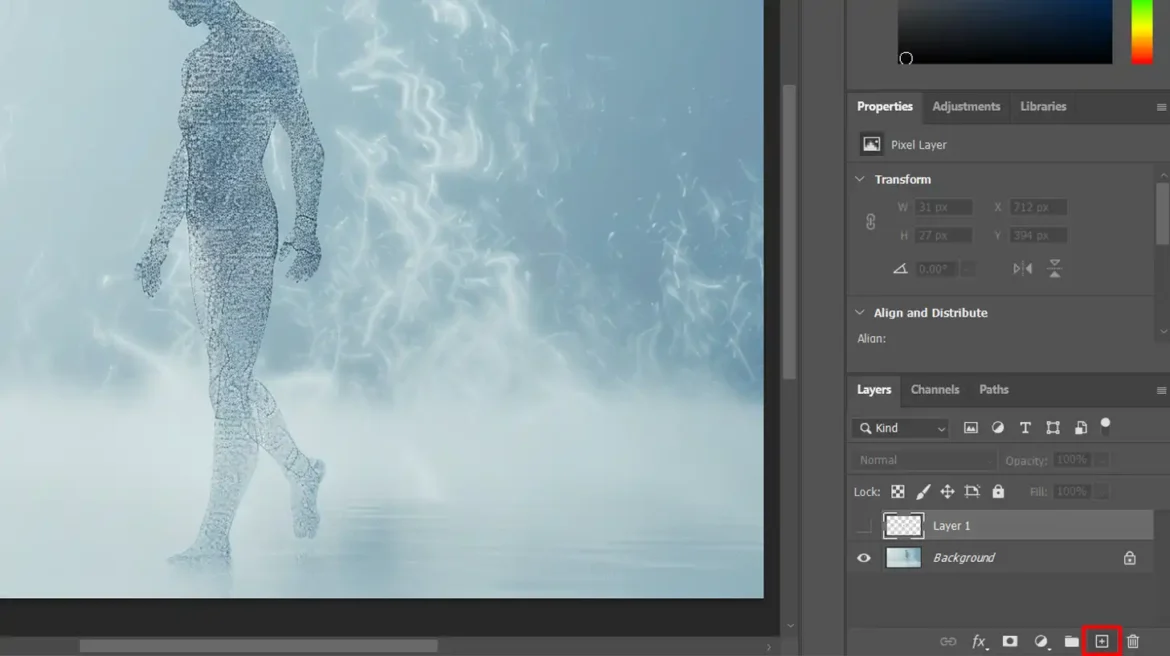
To add a new layer, go to the layers panel and click the “new layer” button.
Photoshop Tutorial: Getting Familiar with the Interface
At first glance, the interface may seem overwhelming, but with a little practice, it becomes easy to navigate. Here are the key elements to focus on:
- Layers Panel: Located on the right side, this panel displays all your visible layers. You can create new layers, duplicate existing ones, and add adjustment layers here.
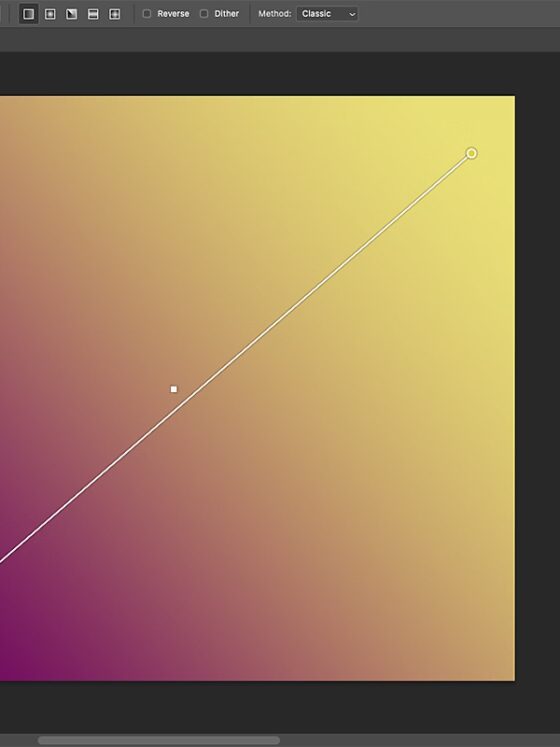
- Toolbar: Found on the left side, the toolbar contains essential tools like the Brush Tool and the Gradient Tool.
Photoshop How-To: Basic Tools and Their Functions
These tools form the backbone of image creation and editing, helping you move through Photoshop with ease and confidence.
Key Tools:
- Brush Tool: Ideal for painting and adding intricate details. You can adjust the brush size at the top of the screen.
- Crop Tool: Allows you to trim parts of your image, helping you focus on the essential areas.
- Spot Healing Brush Tool: This tool helps you remove small imperfections or unwanted elements, blending them seamlessly with surrounding textures.
- Clone Stamp Tool: Copies one section of your image to another area, perfect for duplicating textures or objects.
Working with Layers
Layers are crucial for non-destructive editing. They allow you to work on different parts of your image independently. To apply effects like a drop shadow, select the active layer, go to Layer Style, and choose your effect.
Pro Tip: Always create a duplicate of your original image on a separate layer. This gives you the flexibility to revert to the original if needed.
Enjoy editing, and remember—practice is the key to mastering Photoshop!
Photoshop Editing Techniques: Brush Tool
The Brush Tool is one of the core features of Adobe Photoshop, widely used for painting and adding intricate details to your work. You can find it in the Toolbar on the left side of your screen.
To begin, simply select the Brush Tool and click on your canvas to start painting. It’s that easy! Keep in mind, using a new layer allows you to edit without affecting your original image.
Customizing Brush Settings
Personalizing your Brush Tool settings can help you achieve more precise results. Once you’ve selected the Brush Tool, look at the top menu bar to find options like:
- Brush Size
- Hardness
- Opacity
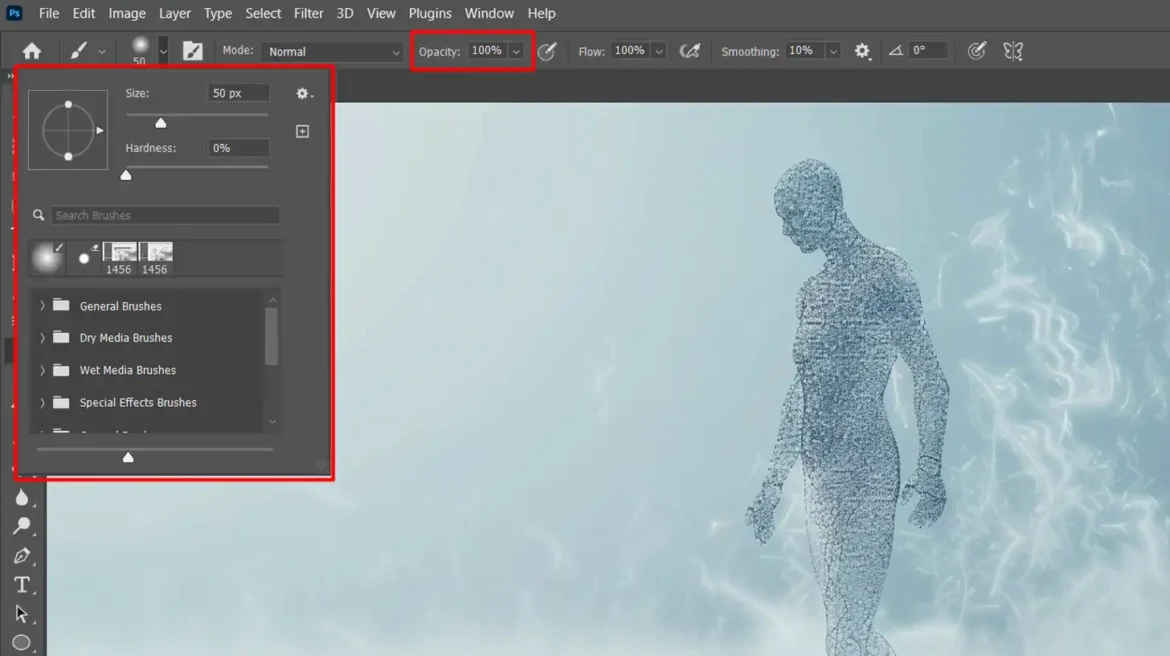
Adjusting Brush Settings for Precision
You can control the size of your brush to determine how thick or thin your strokes will be.
The opacity setting adjusts how solid or transparent your stroke appears, giving you more control over the intensity of your work. Adjust these settings based on your project needs. As always, it’s a good idea to create a duplicate layer before making any significant changes.
Using the Brush Tool for Various Effects
The Brush Tool is versatile and can create different effects based on your adjustments. For example, changing the shape of the brush tip can give you unique textures, such as:
- Fuzzy edges for a soft, blended look
- Hard edges for precise, sharp lines
You can also use the Brush Tool in combination with an adjustment layer for color corrections. Pairing it with the Crop Tool allows you to make more targeted edits—mastering cropping techniques can really streamline your workflow.
Additionally, using the Brush Tool with the Zoom Tool helps you focus on small, detailed areas. While mastering this tool takes time, the effort pays off in the precision and creativity it adds to your edits.
Pro Tip: Speed up your workflow by using keyboard shortcuts to adjust the brush size and hardness quickly. Try using the [ and ] keys for fast changes. For even more efficiency, learn additional Photoshop shortcuts to further enhance your editing speed.
Background Layer
The background layer is the foundational layer in Adobe Photoshop, usually located at the bottom of the layers panel. By default, it’s locked, meaning you can’t move it like other layers. This layer typically holds the original content or the background of your image.
Creating and Managing Background Layers
To add a new layer, click the “new layer” button in the layers panel, which looks like a square with a plus sign.
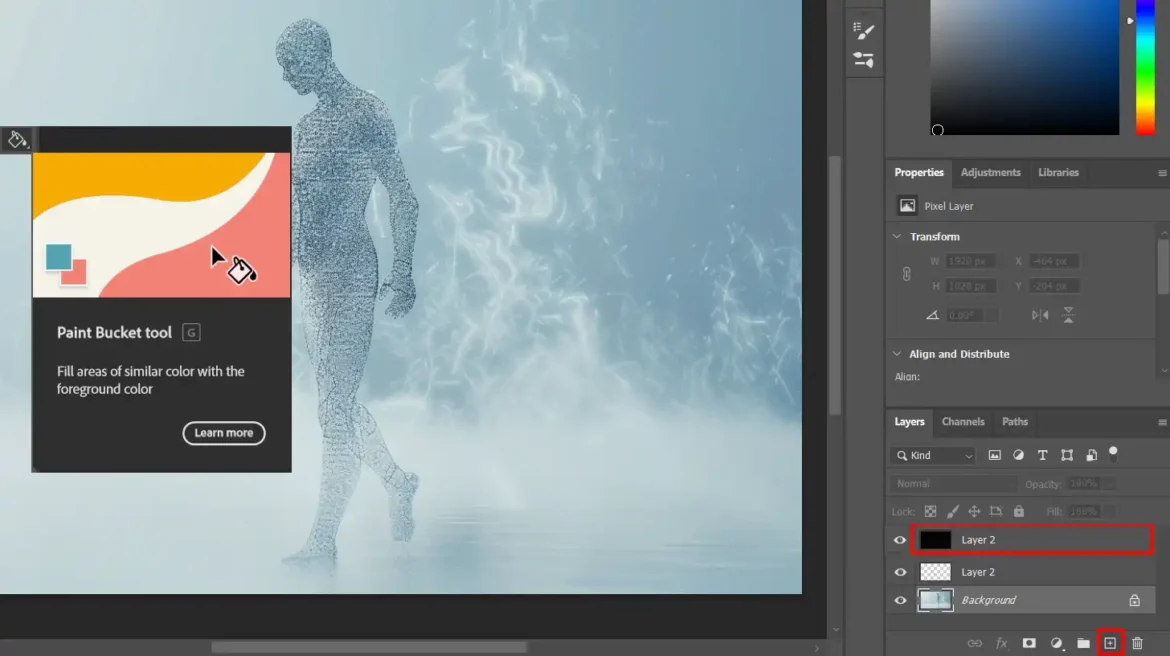
You can use the Paint Bucket Tool to fill the background layer with color or the Rectangle Tool to add shapes. When editing photos, it’s essential to keep the background layer intact as it often serves as the starting point for your edits.
How to Edit the Background Layer in Photoshop
To make changes to the background layer, simply unlock it by clicking the lock icon. Once unlocked, you can edit it just like any other layer—resize it, modify its content, or apply layer effects.
For more complex designs, use multiple layers to add new elements without affecting the background layer that serves as your base.
Pro Tip: Before making major changes, always create a new layer. This preserves the original image, giving you more flexibility and control over your edits.
Advanced Techniques
To gain more control over your edits, try using Smart Objects. This feature allows you to make non-destructive edits, ensuring the original quality of your images is preserved.
Additionally, mastering background removal in Photoshop can be a game-changer. It allows you to isolate subjects and create more dynamic, professional compositions.
Understanding the Layers Panel
The Layers Panel is a key feature in Adobe Photoshop and plays a central role in your editing process. Think of it as your workspace, where all the visual elements are stacked on top of one another. You can imagine it like a digital sandwich, where each layer represents a different ingredient. While beginners may find it intimidating, it’s the foundation for all Photoshop creations.
Organizing Layers
Each layer serves a specific purpose, allowing you to separate and work on individual elements without affecting others. When you create a new layer, you can focus on just one aspect of the image.
To keep your project organized, name each layer according to its content (e.g., “Background” or “Text”). Grouping layers can also help you stay organized and streamline your workflow.
You can drag and drop layers to adjust their order, making it easier to visualize your work. Using color coding for layers adds another level of organization to keep everything in place.
Layer Properties and Options
Each layer comes with various properties and options to give you more control over your edits. Key features include:
- Layer Opacity: Adjusting opacity makes a layer more transparent, allowing underlying layers to show through.
- Blending Modes: These determine how layers interact with one another, affecting how colors and textures combine.
- Layer Effects: Adding effects like shadows or glows can help certain elements stand out more.
For non-destructive editing, experiment with adjustment layers to modify your image without permanently altering the original layer.
Want a transparent background? Use opacity and masks to achieve this effect. If you’re looking to remove an object, the Content-Aware Fill tool works wonders for seamless edits.
Pro Tip: Utilize the Zoom Tool to examine your image up close, allowing you to make precise adjustments. Zooming in to fine-tune small details can have a significant impact on the overall quality of your work. Also, familiarize yourself with Photoshop’s essential tools to enhance your efficiency and speed up your workflow.
Managing Multiple Layers
Handling multiple layers effectively is essential for mastering Photoshop. Picture each element of your design on its own transparent sheet, stacked one on top of the other. This approach allows you to edit one part of your project without affecting the rest. For instance, by placing text on its own layer, you can modify or delete it without altering the background.
The Layers Panel is where all of this organization takes place. Keeping it open at all times ensures you always know which content is on which layer.
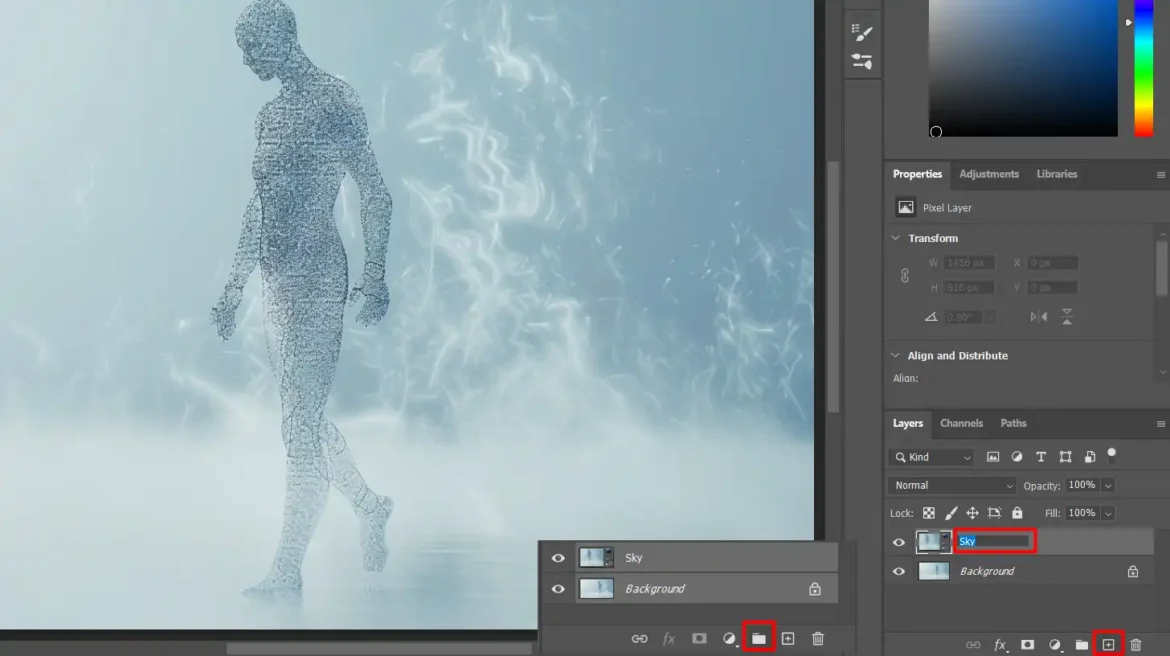
Organizing Your Layers
To stay organized, name each layer according to its content, such as “Background,” “Text,” or “Sky.” This will help you quickly identify each element of your design.
When working with multiple layers, it’s helpful to group similar layers together. This will not only make managing your project easier but will also keep your layers panel neat and orderly.
To group layers, select the layers you want to group and click the folder icon at the bottom of the Layers Panel. This will create a folder to hold all the selected layers together for a more organized workflow.
Layer Masks and Clipping Masks
Layer masks and clipping masks are powerful tools in Photoshop that help you control which parts of a layer are visible.
- Layer Masks: Think of a layer mask as a virtual eraser that can be undone. By painting with black, you hide parts of the layer; painting with white reveals them. This is great for refining edges or adding special effects to your design.
- Clipping Masks: These masks are used to apply effects or adjustments to one specific layer without affecting others. To create a clipping mask, position the layer you want to clip above the base layer, right-click, and select “Create Clipping Mask.” This confines the effect or adjustment to the clipped layer.
Blending Modes and Layer Styles
- Blending Modes: These determine how layers interact with each other. For example, you can use the Multiply blending mode to darken an image or Screen to lighten it. Blending modes can be accessed from the dropdown menu at the top of the Layers Panel. Experimenting with different blending modes can create beautiful results.
- Layer Styles: Layer styles, like shadows, glows, and bevels, add visual interest to your artwork. To apply them, double-click on a layer and explore the Layer Style dialog. This gives you instant changes, like adding shadows or gradients, to make your design pop.
Pro Tip: Use adjustment layers to make color or exposure adjustments in a non-destructive way. This keeps your original image intact while you experiment with different effects. Combine these layers with shape tools for precise adjustments that won’t permanently alter your design.
Boosting Efficiency with Photoshop Shortcuts
Mastering Photoshop shortcuts can significantly speed up your workflow, especially when managing multiple layers. For example:
- Ctrl+J (Cmd+J on Mac) quickly duplicates a layer.
- Ctrl+G (Cmd+G on Mac) groups selected layers together.
These shortcuts save you time and help keep your editing process efficient.
Photoshop vs. Lightroom
Understanding the differences between Photoshop and Lightroom can help you choose the right tool for the task. Photoshop excels in detailed, layer-based editing, making it perfect for tasks like retouching and compositing. On the other hand, Lightroom is ideal for batch processing and organizing large collections of photos. Knowing when to use each program will streamline your editing workflow and allow you to work more effectively.