Photoshop Panorama: Crafting Breathtaking Panoramic Photos

Transforming a simple collection of images into a stunning “Photoshop panorama” can turn an average set of photos into an awe-inspiring wide-angle work of art. Curious about unlocking your creative potential with this technique?
With the right tools and some expert advice, you can craft mesmerizing panoramas that captivate your audience and leave a lasting impact.
Let me walk you through the process of seamlessly merging photos in Photoshop, ensuring each image aligns perfectly for a polished, professional result.
Are you ready to immerse yourself in panoramic photography and take your skills to the next level? Let’s dive into the step-by-step approach to mastering the art of creating flawless panoramas in Photoshop.
Introduction to Photoshop Panorama
Creating a panoramic image is an intricate process involving several essential steps. In this guide, we will explore how to bring these expansive scenes to life using Adobe Photoshop.
What is a Photoshop Panorama?
A Photoshop panorama is the result of merging multiple photos into one expansive image. This technique allows you to capture a broader scene than a standard photograph can show.
By stitching these images together, you create a panoramic view that conveys more of the scene and its story than a single shot ever could.
Creating Panoramic Images with Photoshop
Using Photoshop to craft panoramic images enables you to capture breathtaking landscapes in all their glory. Here’s a brief, step-by-step guide on how to effortlessly combine your photos using the Photomerge feature. Let’s get started.
Step-by-Step Guide to Using Photomerge
To create a stunning panorama using Photoshop’s Photomerge feature, follow these simple steps:
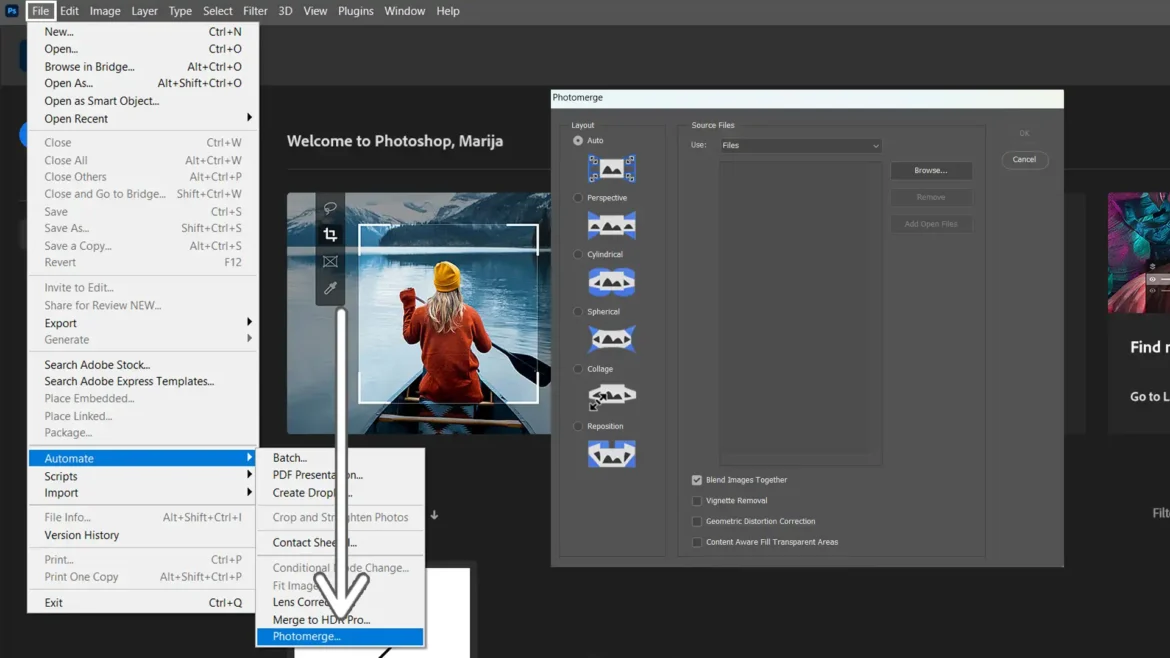
- Open Photoshop and select the Photomerge command from the File menu.
- Ensure all the images you want to use are saved on your computer.
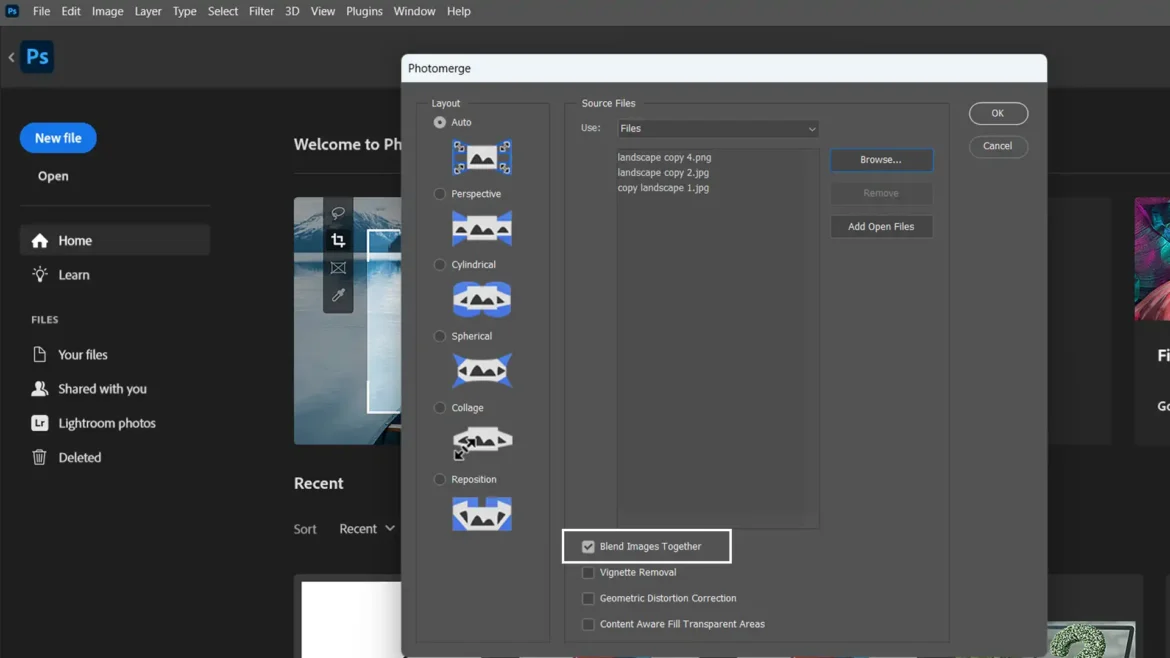
- In the Photomerge dialog box, upload your source images. These will be used by Photoshop to create the panorama.
- Choose a layout option that best suits your scene. Options may include Auto, Perspective, or Cylindrical.
- Once you’ve selected your layout, click OK. Photoshop will automatically begin blending the images.
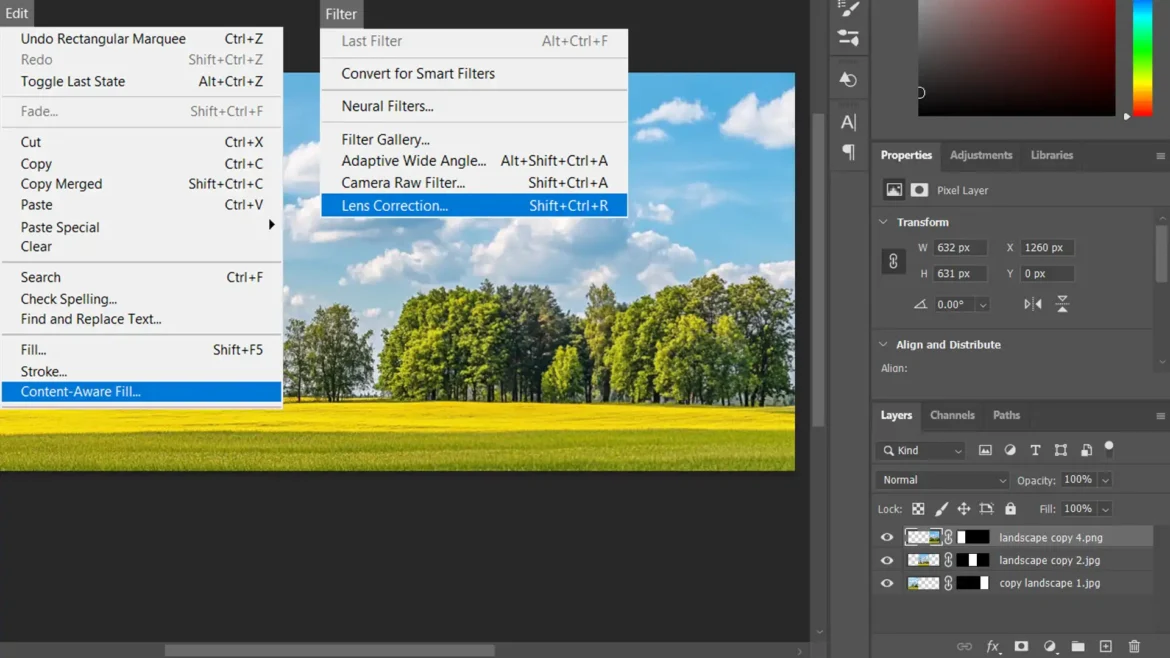
- After the process is complete, review the composite image. Use tools like Content-Aware Fill in Photoshop to fill any empty areas that might have been created.
- Correct any lens issues or geometric distortions that arise from the Photomerge process to ensure a smooth and realistic final result.
Tips for Successful Panoramic Photos
To create a flawless panoramic image, these key tips will help you seamlessly blend multiple shots into one continuous scene:
- Maintain consistent exposure across all shots. This ensures that your images blend smoothly without visible seams.
- Disable auto-focus to keep the camera settings uniform. Manually set the focal length for each shot in your sequence.
- Align the images carefully. Make sure there’s enough overlap between photos to ensure they stitch together properly.
- Account for fisheye distortion if using ultra-wide lenses to maintain a natural look in your panorama.
- Remove vignetting to address any darkened edges caused by lens shading.
Pro Tip: Use a tripod for added stability and ensure your camera’s exposure settings remain consistent to prevent any lighting inconsistencies or mismatches between frames.
Advanced Techniques
Now that we’ve covered the basics, it’s time to explore the more advanced techniques for creating stunning panoramic images. While the foundation is in place, the real magic happens when you start blending images seamlessly and handling distortions like vignette removal.
Blend Images Seamlessly
Crafting a flawless panorama is about more than simply clicking a button. While Adobe’s Photomerge feature is helpful, achieving a truly seamless image requires a creative touch and a bit of patience.
Techniques for Blending Images
To blend your images seamlessly, consider the following methods:
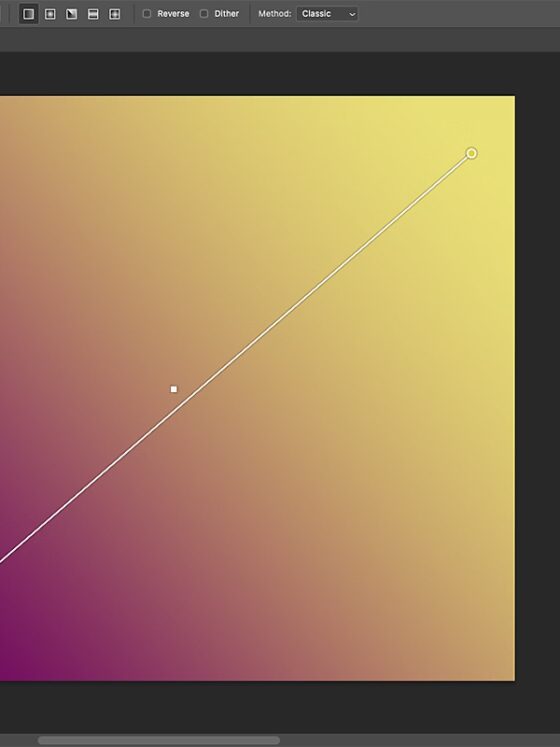
- Layer Masks and Gradients: Use layer masks to gradually blend images where they meet. This technique allows you to create smooth transitions between the edges of your images, especially in areas where Photomerge might struggle.
- Manual Alignment: Sometimes, the automated process doesn’t align images perfectly. Use the Move Tool to manually adjust the position of your images, ensuring they line up perfectly. Zoom in for precision to avoid any visible gaps or mismatched edges.
- Feathering Edges: Feathering helps soften the boundaries between photos. You can apply a slight feather effect on the edges of each layer to create a smoother transition, blending images together more naturally.
- Clone Stamp & Healing Brush Tools: For any visible seams or inconsistencies, the Clone Stamp or Healing Brush tools can be used to fix and perfect the transitions, particularly in areas with noticeable line breaks or color mismatches.
- Adjusting Colors and Exposure: In cases where individual images have varying color tones or exposure, use Adjustment Layers (such as Levels or Curves) to match the tones and lighting across all images, making them appear as one cohesive scene.
- Blurring to Match Focus: If there’s any noticeable focus difference between images, you can apply a subtle Gaussian Blur to the areas that stand out, helping to harmonize the overall look.
By combining these advanced techniques, you’ll be able to refine your panoramas, ensuring they look polished and professional.