5 Photoshop Tricks for Faster Workflow
Photoshop can be overwhelming, especially when you’re juggling multiple tasks on a tight deadline. The good news is that by learning a few tricks, you can speed up your workflow and work more efficiently. In this post, we’ll explore five Photoshop tricks that will help you save time, streamline your process, and give you more time to focus on the creative side of your projects.
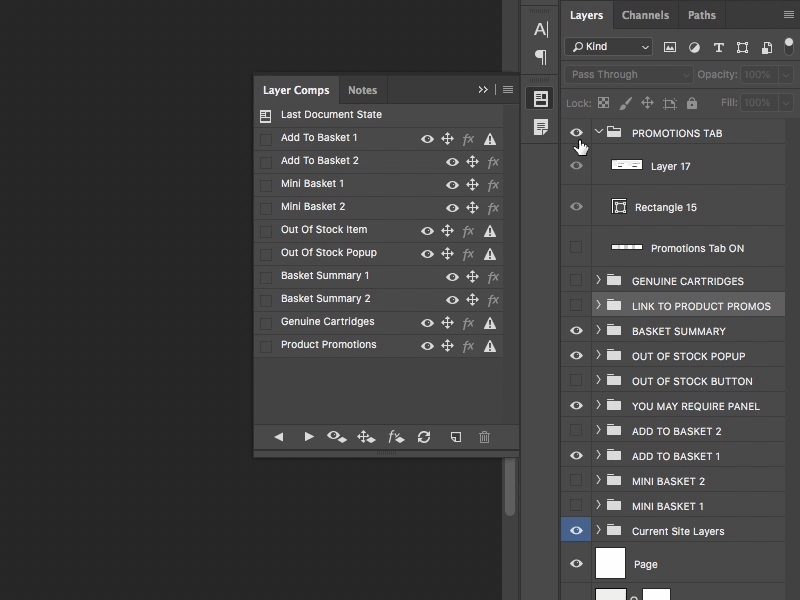
1. Use Layer Comps for Multi-Version Projects
What It Is:
When working on projects with multiple variations, like banners, social media posts, or web designs, you can use Layer Comps to save different versions of your design within the same document.
How to Use It:
- Go to Window > Layer Comps to open the Layer Comps panel.
- Create a new Layer Comp by clicking the New Layer Comp button at the bottom of the panel.
- Adjust your layers to create the first version of your design, then save it as a Layer Comp.
- Repeat this for each version you need, toggling layers on and off for each variation.
Benefit:
Layer Comps allow you to manage multiple versions of your project in one document without creating multiple files. This saves you time and keeps your workspace organized, especially when you need to present or export different variations quickly.
2. Automate with Actions
What It Is:
Photoshop’s Actions are a powerful feature that lets you record a sequence of steps and then apply them automatically with a single click or keyboard shortcut. This is especially useful for repetitive tasks like resizing, adjusting colors, or applying filters.
How to Use It:
- Go to Window > Actions to open the Actions panel.
- Click the New Action button and give your action a name.
- Press Record and perform the series of steps you want to automate.
- When finished, press Stop to save your action.
- To use the action, simply select it from the Actions panel and click Play.
Benefit:
By recording common tasks, you can apply complex edits in seconds. This is a huge time-saver, especially if you need to perform the same steps across multiple images or projects.
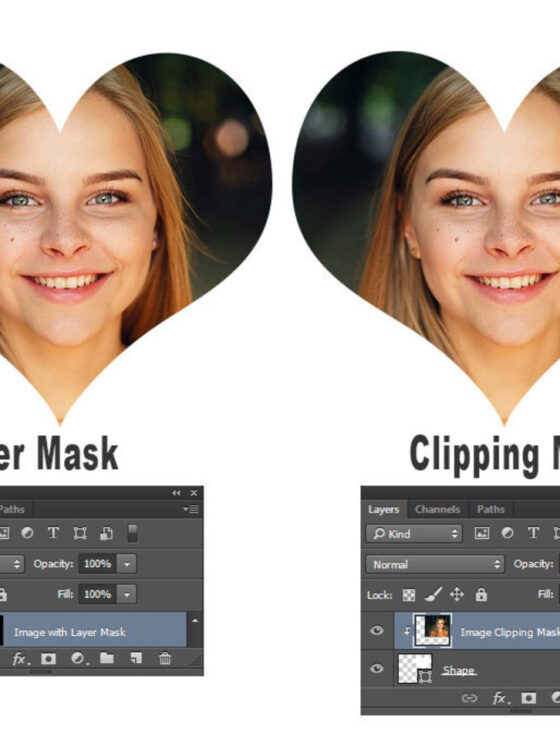
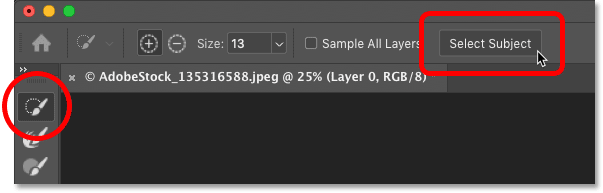
3. Use the ‘Select Subject’ and ‘Refine Edge’ Tools for Quick Selections
What It Is:
Making accurate selections is often one of the most time-consuming parts of any Photoshop project. The Select Subject and Refine Edge tools are excellent shortcuts for creating fast, precise selections.
How to Use It:
- Select the Quick Selection Tool or Magic Wand Tool from the toolbar.
- With the tool active, go to Select > Subject (or use Shift + Ctrl + R).
- Photoshop will automatically select the subject in the image.
- If necessary, refine your selection by going to Select > Select and Mask and adjusting the Refine Edge Brush to fine-tune the selection.
Benefit:
This automatic selection process can save you tons of time compared to manually tracing or painting around the subject. It’s a quick way to isolate elements, especially for portraits or product photos.
4. Use Keyboard Shortcuts for Frequent Tasks
What It Is:
Instead of hunting for tools or commands in menus, Photoshop’s keyboard shortcuts allow you to work much faster by switching between tools and functions instantly.
How to Use It:
Here are a few essential shortcuts to speed up your work:
- Ctrl + J (Cmd + J on Mac) to duplicate a layer.
- Ctrl + T (Cmd + T on Mac) to transform an object.
- Ctrl + Shift + N (Cmd + Shift + N on Mac) to create a new layer.
- Ctrl + Alt + Z (Cmd + Option + Z on Mac) for multiple undos.
- Ctrl + D (Cmd + D on Mac) to deselect a selection.
- Ctrl + Shift + I (Cmd + Shift + I on Mac) to invert the selection.
Benefit:
Using shortcuts for basic tasks like duplicating layers, transforming objects, and selecting elements can save you valuable seconds that add up over time. The more you use them, the faster you’ll become.
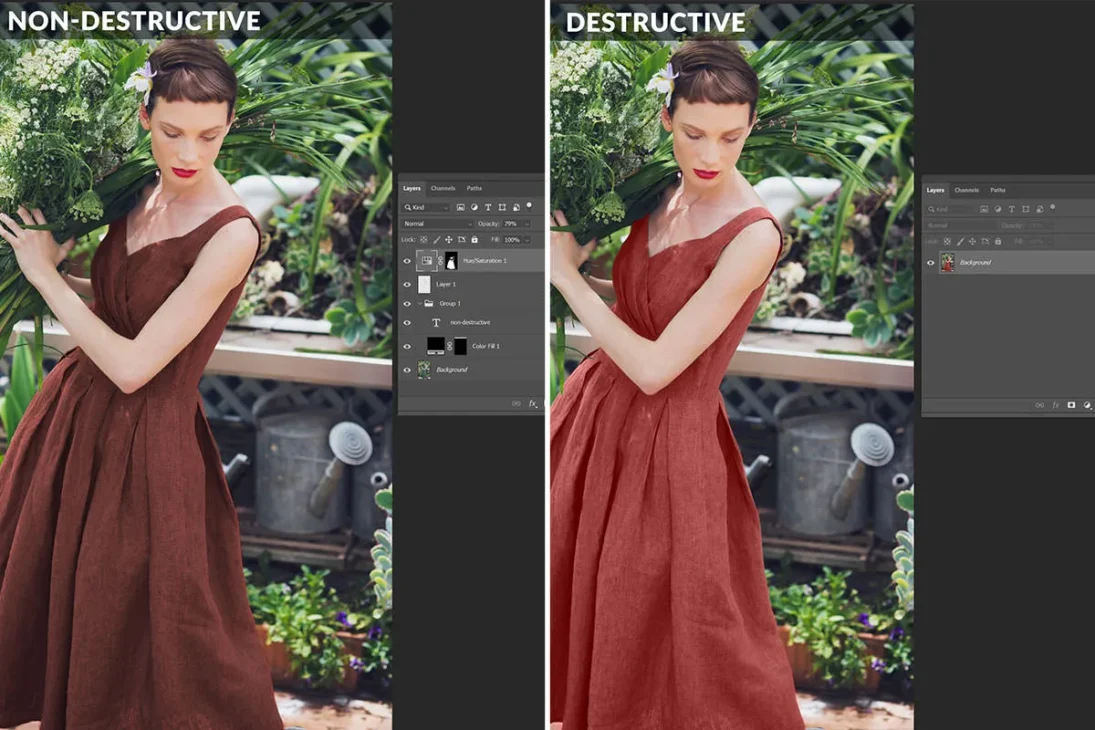
5. Use Smart Objects for Non-Destructive Editing
What It Is:
A Smart Object allows you to apply filters, transformations, and adjustments non-destructively, meaning you can always go back and tweak them without losing image quality. This feature is especially useful for working with images that require scaling or rotating.
How to Use It:
- Right-click on a layer and choose Convert to Smart Object.
- Apply any filters, like Gaussian Blur or Camera Raw Filter.
- Double-click the filter name in the Layers panel to make adjustments at any time.
Benefit:
By using Smart Objects, you can make adjustments and apply filters to your images without permanently altering them. This flexibility allows you to make quick changes, experiment with different looks, and save time in the long run.
Conclusion
By incorporating these Photoshop tricks into your workflow, you can speed up your editing process and focus more on your creative work. From automating repetitive tasks with Actions to using Smart Objects for non-destructive edits, these tips will help you work smarter, not harder. As you continue to refine your Photoshop skills, remember that efficiency is key to staying productive—so embrace these time-saving hacks and watch your productivity soar!