Perfecting Generative Fill with the New “Reference Image” Feature
Remember the days when we had to type out paragraph-long text prompts in Photoshop, begging the AI to please, please, generate a denim jacket that didn’t look like it was made of melted blue plastic? We all spent way too much time acting like prompt-engineers instead of actual photo editors.
Well, as of the latest 2026 Photoshop updates, those days are officially over. Adobe has taken the training wheels off Generative Fill with the full integration of the “Reference Image” feature. Instead of struggling to describe exactly what you want to the software, you can just show it a picture.
Let’s dive into how this completely changes the game for compositing, swapping clothes, and placing objects, and how you can use it to get flawless results without the headache.
Why Text Prompts Were Always Doomed
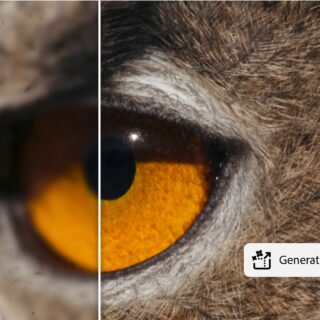
Generative Fill has been cool since it dropped, but it always had a fundamental flaw: words are completely subjective. If you typed “vintage coffee mug,” Photoshop’s engine had to guess the shape, the color, the material, and the lighting. You would hit “Generate,” cross your fingers, and usually end up with a mug that was floating three inches above the table.
The Reference Image feature fixes this by completely removing the guesswork. It allows you to upload a specific image—say, a photo of your actual coffee mug sitting on your desk—and tells Photoshop to use that exact object.
“By using a reference image, you are forcing Photoshop to pull visual cues like style, color palette, and texture directly from your source. It shifts Generative Fill from being a random slot machine into a highly controlled compositing tool.”
Step-by-Step: How to Swap Clothes Like a Pro
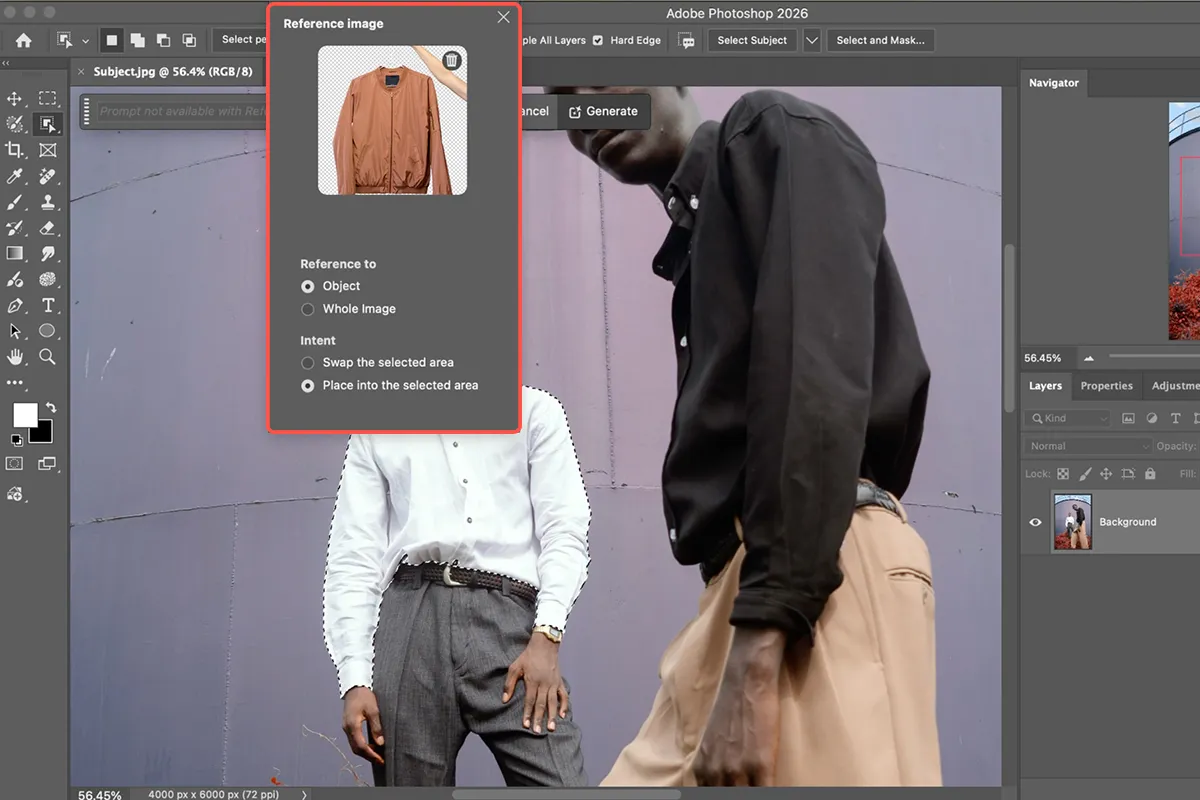
One of the absolute best uses for this feature is swapping outfits. Imagine you have a great portrait of a subject in a boring white t-shirt, and you want to put them in a stylish leather jacket. Here is exactly how you do it in the modern 2026 build:
- Make Your Selection: Grab your Lasso tool or the new Selection Brush. Draw a loose selection around the white t-shirt. You want to make sure you select slightly outside the edges of the shirt so the software has room to generate the new sleeves and a collar.
- Access Generative Fill: Click on “Generative Fill” in the Contextual Task Bar that floats on your screen.
- Upload the Reference: Instead of typing a prompt, click the “Reference Image” icon (it looks like a little picture frame). Browse your computer and select the image of the exact leather jacket you want to use.
- Hit Generate: Leave the text box completely blank. Just hit generate and let the engine do the heavy lifting.
Photoshop will seamlessly blend that specific jacket onto your subject, automatically calculating the original photo’s lighting, shadows, and perspective to make it look like a natural fit.
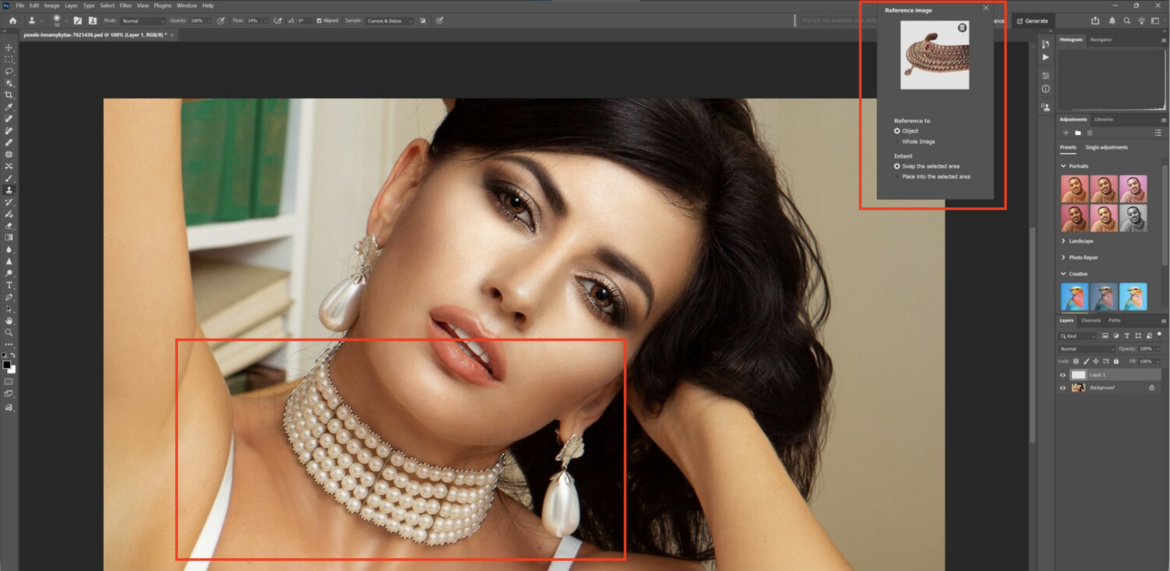
The “Haircut” Problem (And How to Fix It)
If you have tried swapping clothes with generative tools before, you probably know about the dreaded haircut glitch. If your subject has long hair resting on their shoulders, and you select their whole torso to change their shirt, Photoshop will often just delete their hair to make room for the new clothes. It is infuriating.
But there is a brilliant workaround that professional retouchers use to save the hair:
- First, select the entire area where the new jacket will go, including the parts covered by hair.
- Then, hold down the Alt/Option key on your keyboard and use your selection tool to deselect the strands of hair.
- You do not need to make a perfect mask! Just deselect enough of the hair so that Photoshop understands it needs to keep hair in those specific areas.
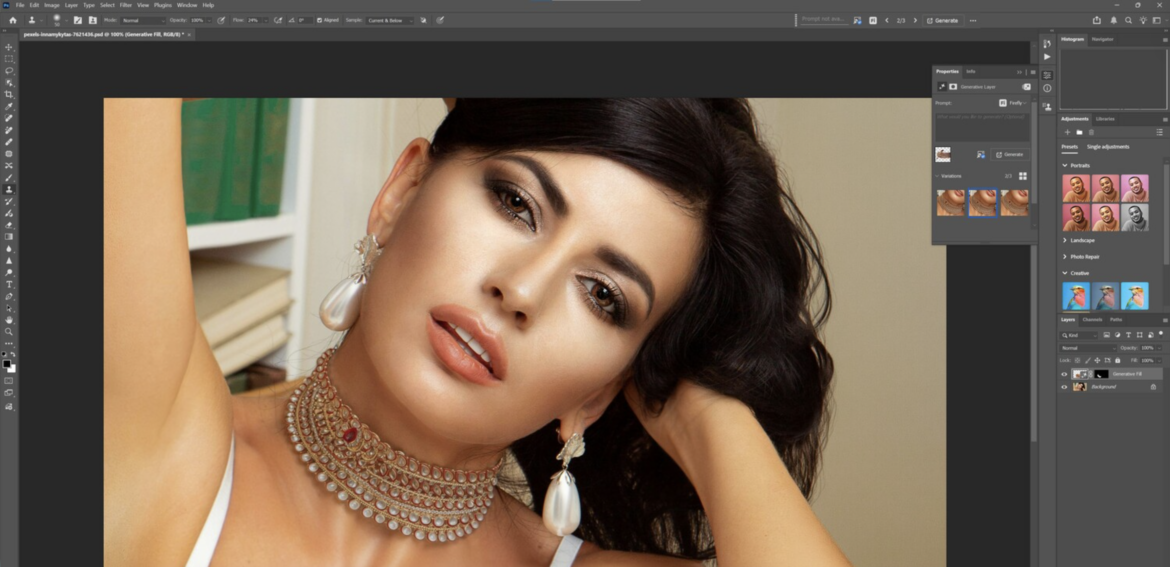
When you run the Reference Image generation now, Photoshop will magically build the new jacket completely underneath the subject’s original hair. It is a massive time-saver.
The Resolution Reality Check
While this tool is practically magic, we do have to talk about resolution. By default, generative features sometimes output at a lower resolution than modern, high-megapixel camera files. If you drop a generated jacket onto a razor-sharp 50-megapixel portrait, the jacket might look a little soft or blurry upon close inspection.
To fix this, you just need to combine a few simple tools in your workflow:
| The Problem | The 2026 Solution |
| Soft, low-res generations | Use the native Generative Upscale (or the integrated Topaz tools) to double the resolution of the new layer. |
| The lighting feels slightly off | Add a Color & Vibrance adjustment layer and clip it only to your generated layer to easily fix the white balance. |
| The layer looks too clean | Drop a non-destructive Grain layer over the generation to match the natural noise profile of your camera sensor. |
Start Showing, Stop Telling
We are finally at a point where photo editing feels less like coding and more like actual visual art again. The Reference Image tool in Photoshop is easily one of the most powerful and practical features Adobe has introduced for daily workflows.
Stop wrestling with text prompts trying to describe the exact shade of “sunset orange.” Just grab a photo, upload it as a reference, and let Photoshop do the busywork.